|
by Ingrid Tristram
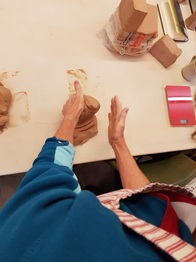
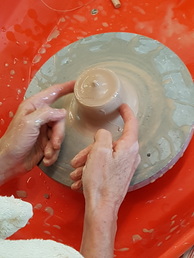
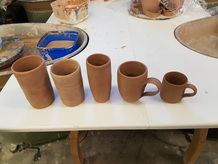
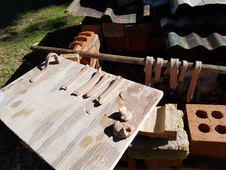
Katherine Mahoney ran a throwing workshop at the CCPS. We expected to get a ‘handle’, so to speak, on throwing techniques and with Katherine’s multiple demonstrations and attention to each of us, we weren't disappointed. We used Keanes 5B clay, a brown clay which has a bit of grog to help us throw more easily. Katherine, for her own work, uses Walker's Superior White Porcelain. Firstly, we spent time wedging clay both the bull's horn and spiral methods. With the bull's horn method it is helpful to hold the ‘horns’ in as you press on the fat bit leaving a ‘nose’ and repeat this roll. The spiral method takes practice - pressing the lump of clay in the top left hand corner with your left hand while guiding the top wedge with your flat right hand. You only need to work and roll this corner and the spirals accumulate in the mass of clay and obliterate air bubbles. Well supposedly! Day 1 task was to throw at least six cylinders weighing 500g each. We practised coning the clay ball up and down. Then we opened it by supporting the outside of the clay ball with our left hands while our arms were well anchored on the wheel frame. Then using the middle finger of the right hand we pushed down and out to the side at a 90 degree angle. Then it is important to cone the clay in and keep it coned in till the end of the throwing. The first lift of the clay is from the base. Fingers soften towards the top. Use "butterfly fingers" we were told! Throwing to the speed of the wheel kept even rings. If finally you wanted uneven rings then you throw up faster than the wheel head speed. If you get an uneven rim use a needle tool in your right hand resting over your thumb of the left hand. Spin the wheel and it will cut an even rim. To make a good rim, the left hand thumb supports the outside of the pot while the middle finger of the right hand moves the clay on the inside to meet the thumb at the top so as not to distort the outside form. Don't let the rim get too thin. When complete use a sponge or chamois to wipe the top smooth. Importantly, Katherine emphasised that in all throwing the diameter of the base dictates the final shape. For example, the ball for a cylinder is compact compared with a broader and flatter ball for a bowl. Well this occupied us fully for Day 1. Day 2 was the time to learn to pull handles for our cylinders to make coffee cups and to practise turning our cylinders. Multiple handles were pulled from a largish lump of clay. Wetting and turning as we pulled handles. We laid them onto broom handles until leather hard. Some people also half pulled handles to attach later to cups and complete the pull on the cup. Katherine demonstrated turning both on a chuck and on the wheel head. If turning directly on the wheel head you dampen the rim and/or place clay small coils for support. Participants introduced Katherine to using Batmate for supporting pots when turning. She had prepared solid chucks for placing a cylinder over the top of it. For a bottle you would make a chuck with a hole such that the bottle would fit upside down to its shoulder. When you turn you look at the inside of your shape and repeat that when you turn the outside. The rough rule is to only turn the bottom third of the cylinder never the rim. We were taught to turn across the base and instead of a foot ring we chamfered the edge, as Katherine said, "punctuation" between the vertical sides and the base. A surform tool is also useful for smoothing out the form. When you take the turned pot off the wheel onto a board, only pick up and put down from the base, that is, don't risk distorting the sides. When you attach a handle, cut the first edge to attach, cut at a slope. Scratch and slip surfaces to be joined. Match the handle to the cup shape. Katherine likes to press the bottom of the handle with two finger presses. Katherine demonstrated throwing bowls off the hump which some of us tried. She cuts the bowls off with a needle rather than pulling a string/gut. Participants were encouraged to throw their own coffee cups in whatever shape they wanted. As we struggled with these procedures which included mistakes, Lisa, one of the participants, said more or less positively, "great things come out of tragedies, sometimes!" Just finally, a few thoughts on glazing. If you want movement choose a fluid glaze. An example of this would be Celadon. Also iron oxide on celadon would run down but it may not on a less fluid glaze. The same glaze on different clays can make a huge difference. Satin matt White on Porcelain is white but on BRT is speckily grey. We all appreciated how supportive and encouraging Katherine was of our efforts. She was also so willing to demonstrate the steps we were learning or reinforcing. Thank you so much for your kindness, help and patience. We were lucky to have this learning experience. Just before signing off, everyone who has participated in the workshops this year has thoroughly enjoyed them. A resounding thank you goes to our brave, hardworking organisers, Clodagh, Jules and Kylie-Rose.
3 Comments
|
Welcome to the CCPS blog!Central Coast Potters Society is a non-profit, community organisation of like-minded volunteers who love clay. Categories
All
Archives
November 2018
|
 RSS Feed
