|
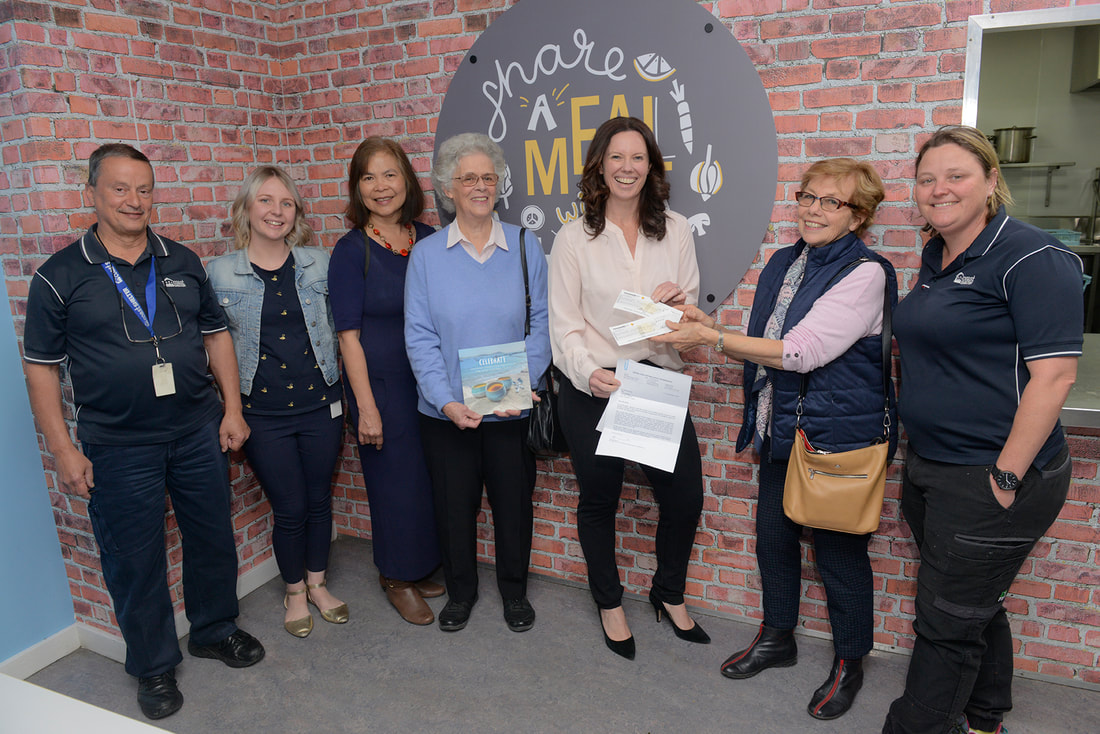
We are so excited to bring you the latest news of the outcome of the ‘Celebrate’ Book Project. Charo Sparkes, Carole Saint and myself visited Coast Shelter to give them our CCPS donation. We presented two cheques, one for $4000, the total profit (after book production costs) from book sales, the café donations and sale of our members’ beautiful pots. The second cheque, for $500, was donated by our CCPS. So $4500 was gratefully received by Rachel Willis, the new CEO of Coast Shelter. Laurie Maher, who so kindly opened our exhibition at Bamboo Buddha, has now retired. Jemma Wilson has supported us throughout this project while Charles Boyton and Joanne Christie, who support clients in a million ways in the Coast Shelter café/Community Centre, have been integral to our project. They also attended the presentation. The goal had always been to buy items that were needed by the Coast Shelter café. This keeps our project true to its aims of liaising with café folk in the community and providing our vessels to hold food for all to see and use. So now we can announce that Coast Shelter have bought a fridge with transparent doors where clients can choose food themselves; eight phone charging lockers where clients can safely leave their phones to charge; two new urns, one freestanding and one already plumbed in; a stick blender and a hand dryer for the bathroom. This project has achieved the goals of the CCPS as outlined in our constitution to “increase the knowledge, experience and skill of members and students in the art and craft of pottery and to promote a greater appreciation and understanding of pottery by the general public”. We hope you all feel proud and we can rightly celebrate. Ingrid Tristram CCPS Celebrate Project Check out the repost on the CCPS Facebook page of Coast Shelter expressing their gratitude for the donation on their Facebook page. Lots of happy faces at the presentation of the cheques to Coast Shelter.
Left to right: Charles Boyton, Jemma Wilson, Charo Sparkes, Carole Saint, Rachel Willis, Ingrid Tristram, Joanne Christie Photo: Rimlight Photography
2 Comments
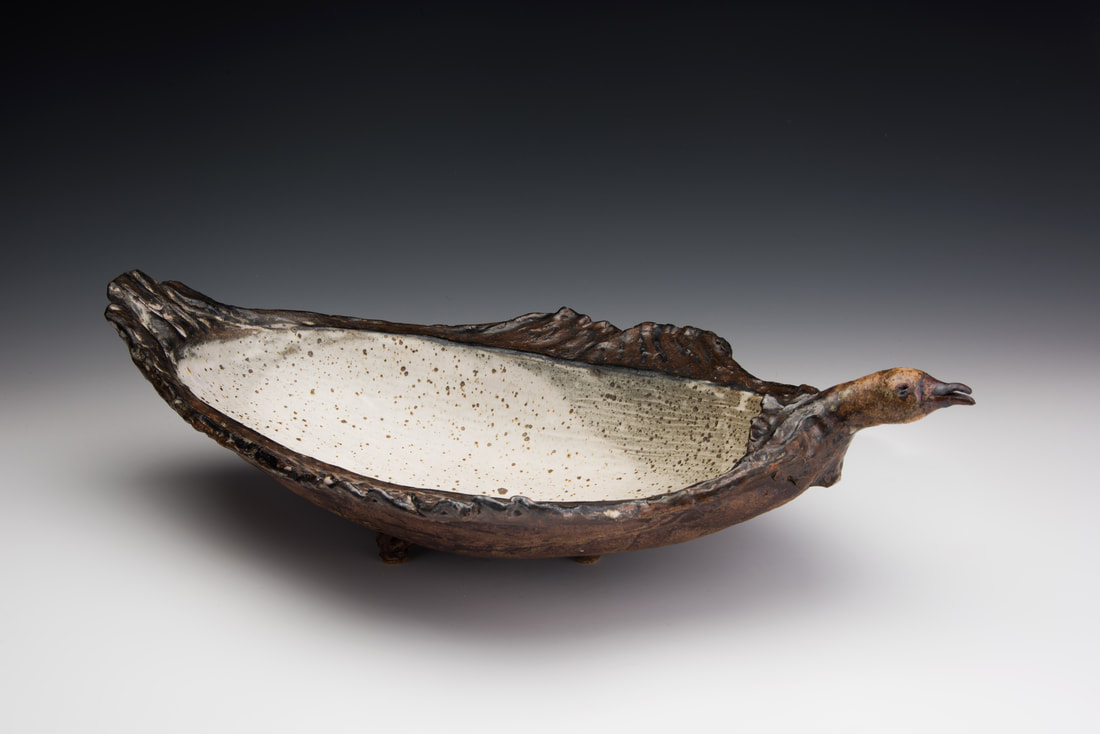
It has been a long-standing desire of CCPS management committees, to photograph the CCPS ceramic collections. However, not until this year have we been successful in investing in professional photographs to document our collections. In so doing, it has enabled a comprehensive cataloguing process to get underway, one that will be an invaluable asset to CCPS. Claire Halon and Jean Miller, with the assistance of Carole Saint, have headed a group of members to cross reference, identify, research and measure each of the 300+ pieces in our collections. This has been no mean feat. Many hours have been dedicated to checking and double checking to ensure the details match and are accurate. Many thanks to the members who have dedicated time to these important jobs. In 2019 Gosford Regional Gallery will once again display ceramic work. This time it will be from our collections; an exhibition called Significant. We have had a terrific opportunity to collaborate with Dr Grace Cochrane on this project. Grace is “an independent curator, writer and consultant, from 1988-2005 she was the curator, later senior curator, of Australian decorative arts and design at the Powerhouse Museum, Sydney. Author of The Crafts Movement in Australia: a History (NSW University Press, 1992), for 40 years she has talked about the crafts and design in lectures and at conferences in Australia and overseas, has written for a range of journals and publications, and examined submissions from many PhD and Master’s candidates” (https://au.linkedin.com/in/grace-cochrane-b50b11117).Grace has started work on curating the collections for the Significant exhibition. The cataloguing and photography have proved invaluable in this process. Claire has chronicled the process of compiling the catalogue information, as well as asking for information regarding some unknown details and/or gaps in our collection - see below. Judith Barrett (b.1927, Australia) CCPS Member, workshop presenter Bowl, Fruit Bowl for the Birds, 1984 stoneware, white glaze, gas fired, 15 x 57 x 30cm Winner CCPS Acquisitive Prize, 1984 theme Something for the Birds, judge Michael Keighery CCPS General Collection “I awarded the prize to Judy Barrett because her bowl captured a sense of flight and also has a nice sense of whimsy, which would make its use something of an occasion.” Michael Keighery (CCPS Newsletter, July 1984) Photo: Lightplay The Cataloguing Process Step 1. January – July 2018 Photographing the collections Initial photography completed on 16,17 & 18 January 2018 The process involved photographer Stephen Cummings of Lightplay, assisted by Lesley Weber, Jean Miller, Carole Saint, Charo Sparkes, Joy Nagy, Marienne Stollery, Lou Whiting and Claire Halon. Works were removed from the cabinets, placed in order, photos were taken, pots returned to an unused table where they were given collection numbers and brief identification details, returned to the cabinets, and new works set out. This rotation meant the process worked efficiently. At the same time, a spreadsheet of the works was developed, using the basic information available for each piece. The combined sections of the collection were photographed in the following order: 1. Joan Matthews Collection – 155 pieces As there was already a catalogue of this collection, it was the most efficient place to start, as the pieces were arranged from 1 – 155 (with a few variations) which worked well for recording on the spreadsheet, and it gave an opportunity to prepare other sections. 2. The Penny Riley Collection – 23 pieces Some had names and descriptions, others presented as numbered but un-named pots. Brief, obvious features were listed, for identification later. 3. The CCPS Collection – over 150 pieces (to be catalogued) Before this process commenced in January 2018, there had been no records found of purchases or donations, so each piece required close scrutiny, checking for maker’s marks, etc. Workshop or demonstration purchases or donations were slightly easier to process. However some pieces still remain ‘unknown’, except of course for the physical qualities. Identification is an ongoing process. At this point I congratulate those members who were involved with the CCPS Newsletters, especially the 1970 – 1990 period. My knowledge of CCPS has been heightened as a result of reading all of the Newsletter Reports on excursions, workshops and demonstrations - a treasure trove of information, and extremely useful in identification of many of the ‘unknown’ pieces. It was the July 1973 Newsletter, describing a planned excursion to Peter Dobinson’s pottery at Allendale, that secured my favourite piece of information: “The Society has already decided to buy a pot from him to start a collection”. It was early August 2018, two months ago, when I finally identified that pot. Peter Dobinson’s stoneware blossom jar is now Number 1. in the CCPS Collection. 4. Award Winners – 8 pieces (names and most details available) The Rest of the CCPS Collection – gathered as closely as possible into cohesive order, such as Founding and Life Members and demonstrators. Many of the pots in this category have been donated, many with details of origin, others with none. Online sites such as Bemboka have proved to be a rich source for identification. Lack of an identifiable Potters Mark is the biggest issue. I urge all CCPS Members to sign every pot that they make to allow for any future identification. Several pots ‘escaped’ the photography queue, and will hopefully be photographed on September 21. Step 2. August – November 2018 Having classified most of the 300+ pots in the collections, the next task has been to link the photographs to the pots. Having the spreadsheets to work from, and the jpeg number of each photograph, the basic classification has proceeded slowly, but has nearly been completed. I have completed the task of linking the jpg number to the CCPS pot number and description, ready for the next step. Carole Saint has provided a great deal of assistance in the sorting and printing of catalogue - standard templates. Kylie Rose McLean sorted the details required when she was preparing material to send Gosford Regional Gallery for advertising purposes. Mandy Francis has been importing each image to match the catalogue information. She is making great inroads into this process. Following this, there will be a tidy up of the individual pot details. The Final Details One of the final activities to complete is the measurement of each item. This is not an activity that I want to do alone. My request is for some willing CCPS Members to donate a few hours, over one or two weeks, and probably on a Monday or Tuesday at the end of Drop In, or in early October in the school holidays when there are no classes. My plan is that we have a few pairs of steady handed members, with a knowledge of the metric system, working to complete the measuring - one to measure, the other to record. There will be a demonstration of the process to follow, and the pots will be set out ready for the activity. It should not take long for the 300+ to be done in an assembly line production. Once this has been completed, we will be well on the way to having quality details of our valuable collections, and will be ready to publish the details for a variety of purposes. The main purpose is as a resource for members so they can interact with the collections, and cross reference all the details. We will also be able to provide our exhibition curator, Dr Grace Cochrane, with detailed information. This work has been motivated by the CCPS Collections Exhibition, Significant, to be held at Gosford Regional Gallery from 9 February to 24 March 2019. The CCPS Sub Committee of Lesley Weber, Kylie Rose McLean and Claire Halon, are working to deadlines to realise this exhibition. We need all the preliminary work finished this month (September), decisions regarding content to be decided in October, and in November/December GR Gallery details, signs etc need to be finalised. We have no time to waste, but the three of us feel that this exhibition, curated by the experienced Grace Cochrane, will be very special. Missing Links One of my main objectives in taking on the position of Collections Curator with Jean Miller in 2015 was to build up our collection of pots made by Founding Members and Life Members. With our 50th year in mind, it was time to fill in the gaps. If you know the details of the two works below, or have a pot made by any of the following potters, or you know the location of any, please contact me with the details. We are keen to purchase pieces or have them donated to our collection. It would be an achievement to complete this task before our 50th year is over. Founding & Life Members Penny Carr - Founding Member Noni Convary - Founding Member Marion Hanks - Founding Member Irving Silvey - Founding Member Topsy Thomas - Founding Member Miriam Mullard - Founding Member Penny Riley - Life Member Veronica Bliim - Life Member
Our Open Day held on Saturday 19 August was part of the Australian Ceramics Open Studios (ACOS) event hosted by The Australian Ceramics Association, where hundreds of ceramic artists across Australia open their studios to the public over a weekend that is a celebration of clay, creativity and community. That is exactly what we had, a celebration of clay, creativity and community.
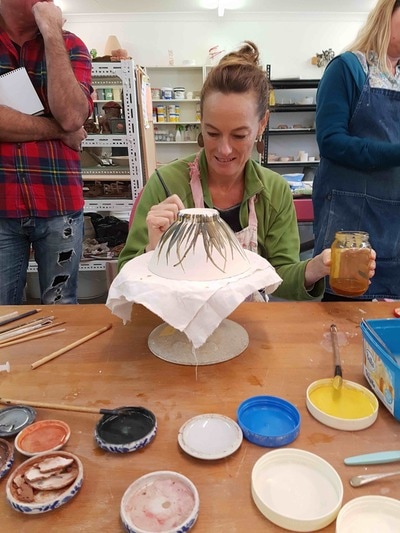
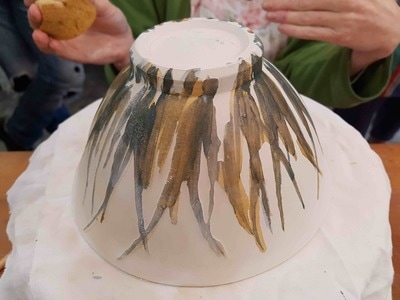
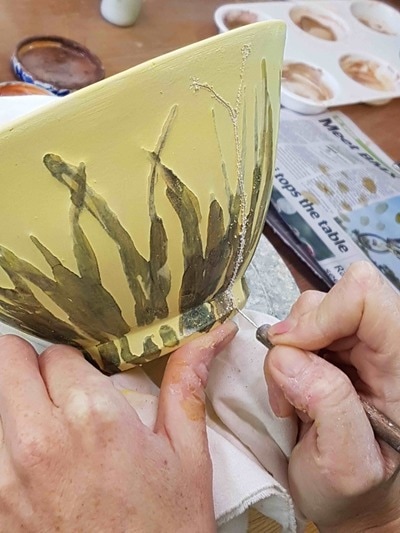
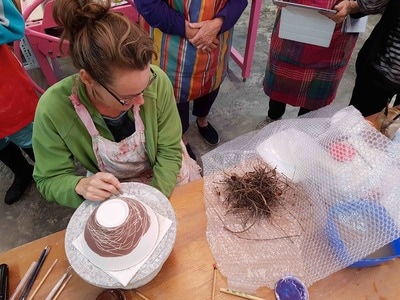
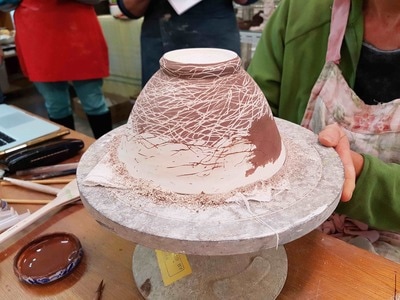
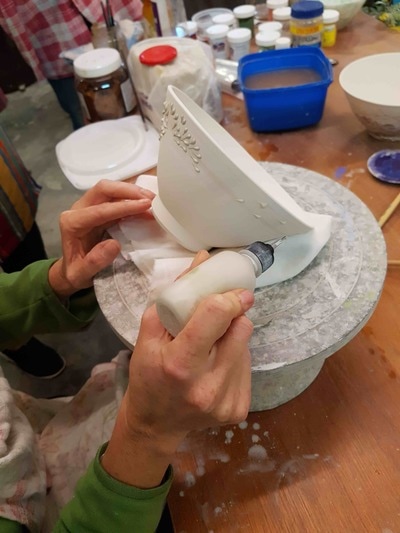
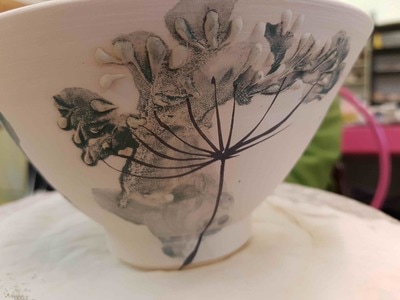
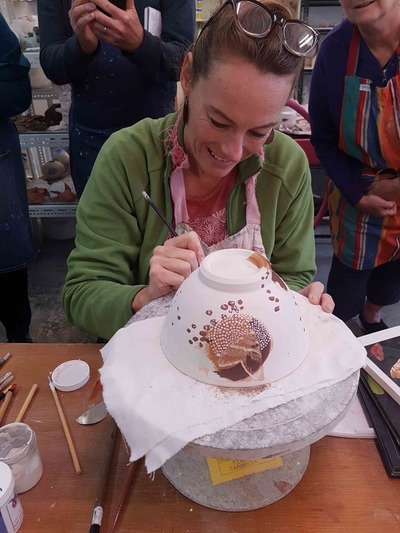
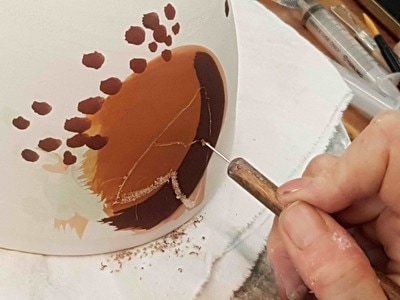
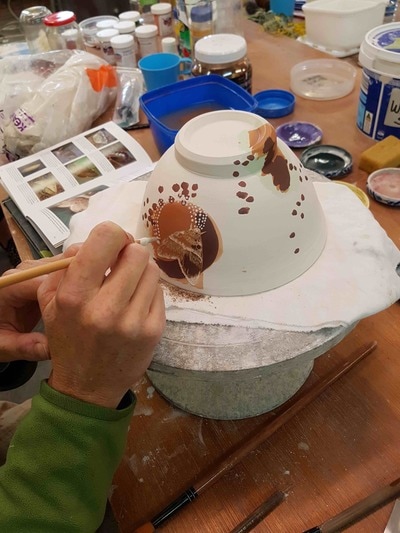
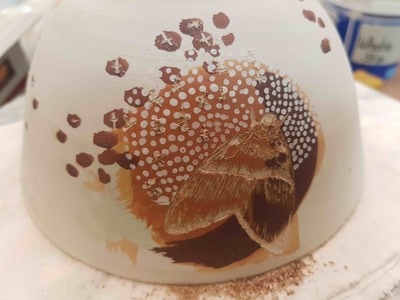
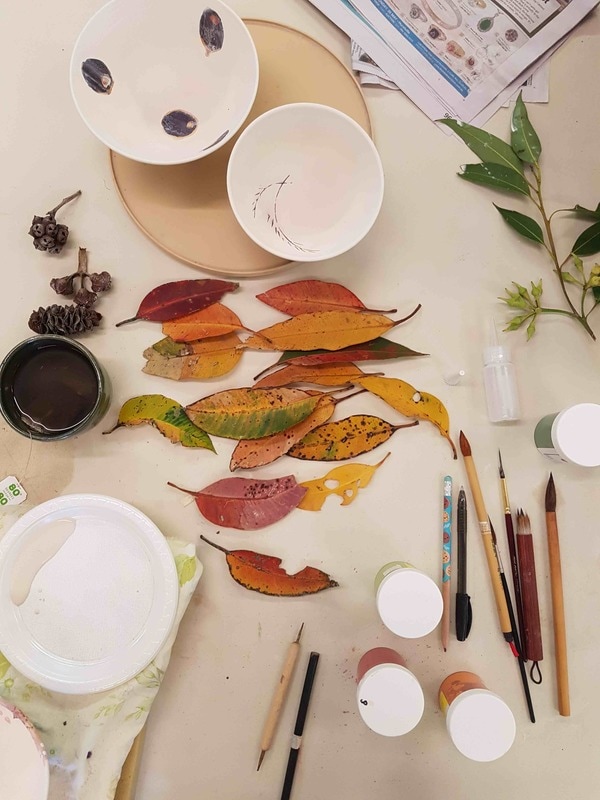
The CC Handweavers, Spinners & Textile Arts Guild, The Makers Studio and the Family History Group all joined with us as the Gosford Community Precinct holding one huge Open Day. There was so much to see; the studios, demonstrations, wonderful work, great food, good company. It was lovely to see old faces, new faces and listen to the enthusiasm of guests that would like to come back for more. One comment I would like to share, ‘the whole precinct came over as modern, progressive, and welcoming’. What more could we ask. Thank you to all those who participated. It was a brilliant day. Unfortunately, we couldn’t hold the pit firing last Wednesday as it was way too windy. Hoping it all bodes well for this Wednesday. by Lesley Webber, President 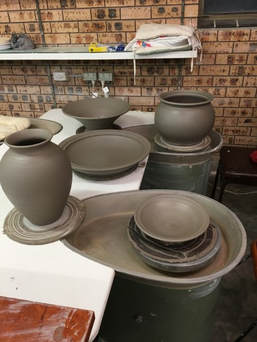 Photo by: Denise Gonzales Photo by: Denise Gonzales Review by Jody Stone “Are you sure that I’m not going to hold everyone back?” “And this workshop is definitely for beginners?” I asked my close friend Clodagh for the third time. Clodagh not only introduced me to ceramics but happened to be one of the the organisers for the Cameron Williams Workshop, hosted by the Central Coast Potters Society, recently. I had never done wheel throwing before and in fact only began, my now genuine fascination with all things clay, this year. I’ve been a beginner in hand-building, slip-casting and now wheel throwing. This workshop was like nothing I had ever experienced before as a student. There is a wonderful lesson to be learnt within every lesson delivered by clay masters. Cameron Williams is definitely a master of his world. He carries the rare qualities of a quiet strong sense of self and almost no ego. He knows where his strengths lie, whilst at the same time retaining a humility that makes him reachable to students needing to ask questions. (Over and over and over again) He is renowned in the world of clay as a “big thrower” and has been developing his unique techniques across his 30 years of practise. Watching his demonstrations over the four days was captivating. Seeing someone demonstrating with such a love for their trade was simply inspiring, but not overwhelmingly so. On my first morning my stomach was filled with butterflies. I talked to a couple of other students, and found out I wasn’t the only one with a bit of nervous anticipation. We began each day setting up at a lovely pace, making a cuppa and easing into the day of satisfying practice and hopeful but not overly expectant production. Our teachers emphasized that the focus of the workshop was not to take home loads of bowls and vases. Practising the steps and replacing the humps of clay onto the wheel repeatedly to move towards an outcome of sorts was the overall emphasis. I found this hugely reassuring. Yet we all did produce and take home some lovely work in the end. It was merely a gentle starting point for all of us to learn without too much pressure. After set up we would then be given a demo of the day’s focus. The first day was decent sized bowls using Cameron’s unique large throwing techniques, to be applied the next day with larger lumps of clay and larger vessels. We took notes, and digital footage throughout, in order to remember the steps once we moved back to our work spaces. Then, it was game on. I personally need to “throw myself in” as opposed to sitting and thinking when I feel daunted. So, as soon as I got to my wheel, I got a lump of clay, secured it as we had been taught and began centering. It worked! I couldn’t believe it. Then, I somehow un-centered it…. Looking about the room wondering if Cameron was busy I caught the eye of Cameron’s trusty assistant Neil Fenning. Neil was exactly like a very fit looking version of Father Christmas, including that lovely gentle way that gorgeous grandads have about them. Having Neil catch my eye, and see the “please help” look he immediately came over. And that is how the workshop ran, with Neil and Cameron circulating the room with quiet, confident and patient understanding, attending to all of us with our questions and skill acquisition phases. Looking around the room at some very skilled and experienced artists working away was also a wonderful part of the experience for me. The work got better, bigger and more polished as the days progressed. I kept thinking, one day I could be producing such work, how amazing would that feel? As it was I was feeling pretty satisfied with my learning curve. I came home with three beautiful bowls and 3 vases. Partly assisted in their creation, but proudly sharing those memorable moments by way of initialing Cameron’s Neil’s names on one bowl and vase each. Both wanted me to just put my name alone on them but I wanted to remember my teachers and my beginnings. The workshop built upon the previous day’s knowledge in order to have us producing larger and larger pots, plates and vases over the four days. I’ve left one of the best features of a Cameron Williams workshop until last. This man is not only a skilled artisan, great teacher, but also a fantastic cook. We were lucky enough to experience delicious lunches produced by the man himself from his purpose-built, clay-fired pizza/tandoori oven. Cameron and Clodagh and a couple of others would down tools at 12:30 to prepare the meal, then we would all be eating by 1pm and back to it at 2pm with a few of us on clean up rotation with Clodagh. Watching Cameron have fun at work with the pizza dough and produce such culinary delights was a moment I looked forward to in the day. I happen to have a very healthy appetite for gorgeous food, so for me this workshop had it all! I want to say a personal than you to Cameron Williams and Central Coast Potters Society for giving me a wonderful start into the world of wheel throwing. The efforts behind the scenes by some very hard-working volunteers have created such value to my life that words really don’t cut it. But worth giving it a shot. Shannon Garson’s visit to CCPS at the end of May was a delight. The Friday evening presentation provided a wonderful introduction to her background and work, offering plenty of inspiration to all present, and preparing workshop participants for the weekend ahead. The focus for this workshop was surface decoration - an opportunity to explore the surface of our clay pieces. Coming from a painting background, with rich knowledge of colour ingredients and mixing, and skill in brushwork, Shannon’s approach to surface decoration is simple and experimental at times. She breaks the “rules”, mixing oxides, terra sigillata and stains as required to achieve the right consistency and colour. Her techniques have come from much experimentation and testing. She has built up a repertoire of marks and techniques over many years, developed from close study of the bushland near her home in Maleny, Queensland. Shannon’s beautiful drawings display a combination of these marks. They wrap the whole surface of her porcelain pieces, articulating stories from the natural environment, providing moments of discovery as you lift a cup or turn a plate. In the course of the weekend workshop Shannon shared many tips and techniques; we were constantly busy applying them to our bone dry work. Shannon began by taking us step by step through “The Paddock”, one of her compound designs - layering the grass, filling in the background, adding the dragonflies and small decorative elements. It’s a process of storytelling as each layer embellishes the surface, is wiped away to create greater emphasis, covers the piece with colour or incises the surface to add detail. Lines are painted and filled in to highlight differing features of this well-thought-out design. Shannon’s stackable ceramic paint palettes are in constant use. “The Paddock” design is made up of a blend of copper oxide and copper carbonate, and yellow, brown and orange underglaze/stain mixes. Clay or other colour mediums are mixed together to achieve the desired colours and consistencies, and to avoid the jelly quality of the underglaze. From “The Paddock” design we learnt how to break down our ideas into a collection of symbols and techniques; how to use brushes loaded with underglaze to paint blades of grass and backgrounds; how to raise the grass using shellac resist and wiping back; and feature grass stems, flowers and dragon flies with sgraffito, infill, scraping back and touching up. We took these techniques and applied them to our own pieces, inspired by the items we brought to the workshop. To avoid wiping off or scraping back aspects of a design, careful consideration must be given to which technique is used and when - how will the design be layered? Shannon demonstrated the creation of her “Nest” bowl where we discovered how to play with positive and negative line markings using sgraffito and infill. Shannon reinforced how important it is to draw directly from your source object. We played with slip trailing after watching her describe her "Dandelion" design with confident strokes from the slip trailer, embellished later with watercolour style line work. Shannon also shared her “Moths in Wallum” design. It was a pleasure to watch her masterly hand using her pin tool to draw. Shannon has distilled the most important aspects of the moths to describe them in great detail. In creating this design she explained the importance of relating the “patches”, of linking them with spotty marks so they relate to each other. Terra sigillata plays a big role in this design. Shannon’s simple recipe of ground clay, water and time provides a ‘no fuss’ base to a variety of colours. Oxides are added to the terra sigillata and underglaze mixes to alter the colour. To lighten, use a white terra sigillata rather than slip. We were able to fire our test pieces overnight and view them on the Sunday. This gave us a taste of how our new-found techniques worked on the clay bodies of our choice. It was a challenge to think about the dimension of the surface, to work out how to bring about an idea in layers using each or some of these techniques, but it was great practice in breaking our ideas down and building our collection of marks to use in different ways on future work. I found the following, very practical tips from Shannon most inspiring. Paying attention to breathing - breathe in as you load the brush or pick up a tool, and out as you work. This ensures a steady hand when working on your piece. Support your drawing hand - draw confidently by supporting your arms in a tripod configuration including using your chin. Take a relaxed, 'anything is possible' approach - be open and unrestricted in your ideas for making and decorating. Compile inspiration books - build a library of your photographs and ideas through the many differing online bookmaking sites such as Photobookshop, Blurb and Snapfish. Draw from the source - this maintains integrity in your drawing, it looks alive not contrived. Press objects into clay - see inspirational objects from a different perspective by pushing them into wet clay and printing with them. This can assist you in building your mark making repertoire. Find a way to be creative that works with your life situation - look for ways of creating a fit between your life and being creative, with the time you have. Shannon was incredibly generous and open with her knowledge. She spent considerable, concentrated time with each participant and her calm, positive energy created a focused and relaxed working environment. Thank you Shannon, we’d love to have you back again.
I encourage you to check out some of Shannon Garson’s videos on her Vimeo page. Kylie Rose McLean CCPS Educational Workshops Team All photographs by Kylie Rose McLean Clodagh, Jules and I would like to acknowledge Lynn Treers for her help in making and turning all the bowls for Shannon to demonstrate on. Thanks Lynn, it was a great help! I arrived to lots of excited chatter, anticipating the fun and learning about to happen.
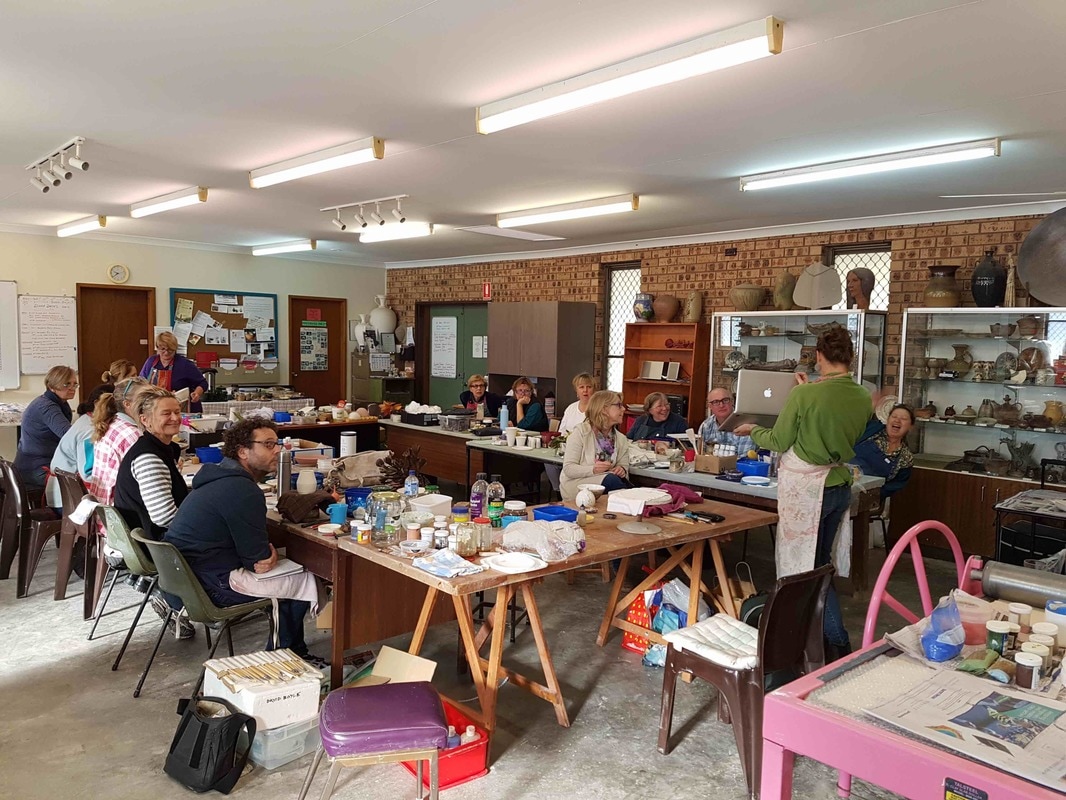
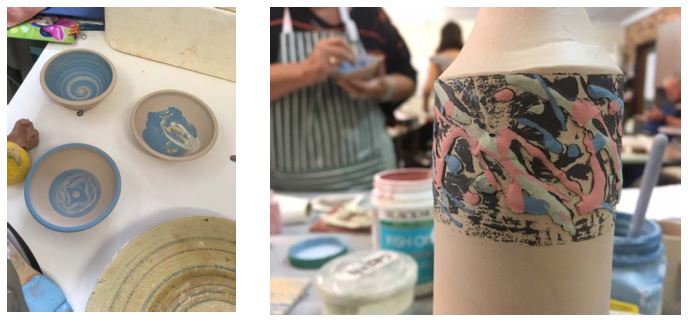
Marienne placed us under the umbrella of ‘only pottery associated things to be discussed for our time here’. She then centred us all with some light exercises and relaxation. This focused everyone on the task ahead. Once down to business, Marienne demonstrated how to make a slip, with many helpful hints thrown in, proving to be the trend for the day. Marienne has a wealth of knowledge which she shared with us, little tidbits of information popping out all the time; such as the ideal base to width dimensions of a bowl and why slip as opposed to underglaze. If you want to know the answers to these questions you will have to wait for next year, when we’re hoping to convince Marienne to hold another workshop. Over the morning Marienne demonstrated 12 techniques of how to apply slip. Some of them included using the wheel, some painting, some dipping, slip trailing, such a variety. Some were simple, others taking practice to achieve, all were visually interesting. I think this workshop gave all attendees something to carry on with. Morning tea was plentiful and scrumptious (as I believe has become our tradition at the Workshop), along with much chatter and laughter. Not just lots of food, but lots of food for thought. Towards the end of the workshop, someone said, ‘we will have to do this again’ and everyone agreed. It was not only an informative workshop, but fun. Thank you Marienne for sharing your knowledge, skills and passion with us. Lesley Weber CCPS President Recently, I had the pleasure of visiting John Tuckwell's studio in Bellingen, northern NSW. This was my first trip there. The heritage country town of Bellingen impressed me for its arts and craft and a somewhat new- age feel, not to mention great eateries, coffee and live music. Nearby there is also the majestic Dorrigo National Heritage Forest.
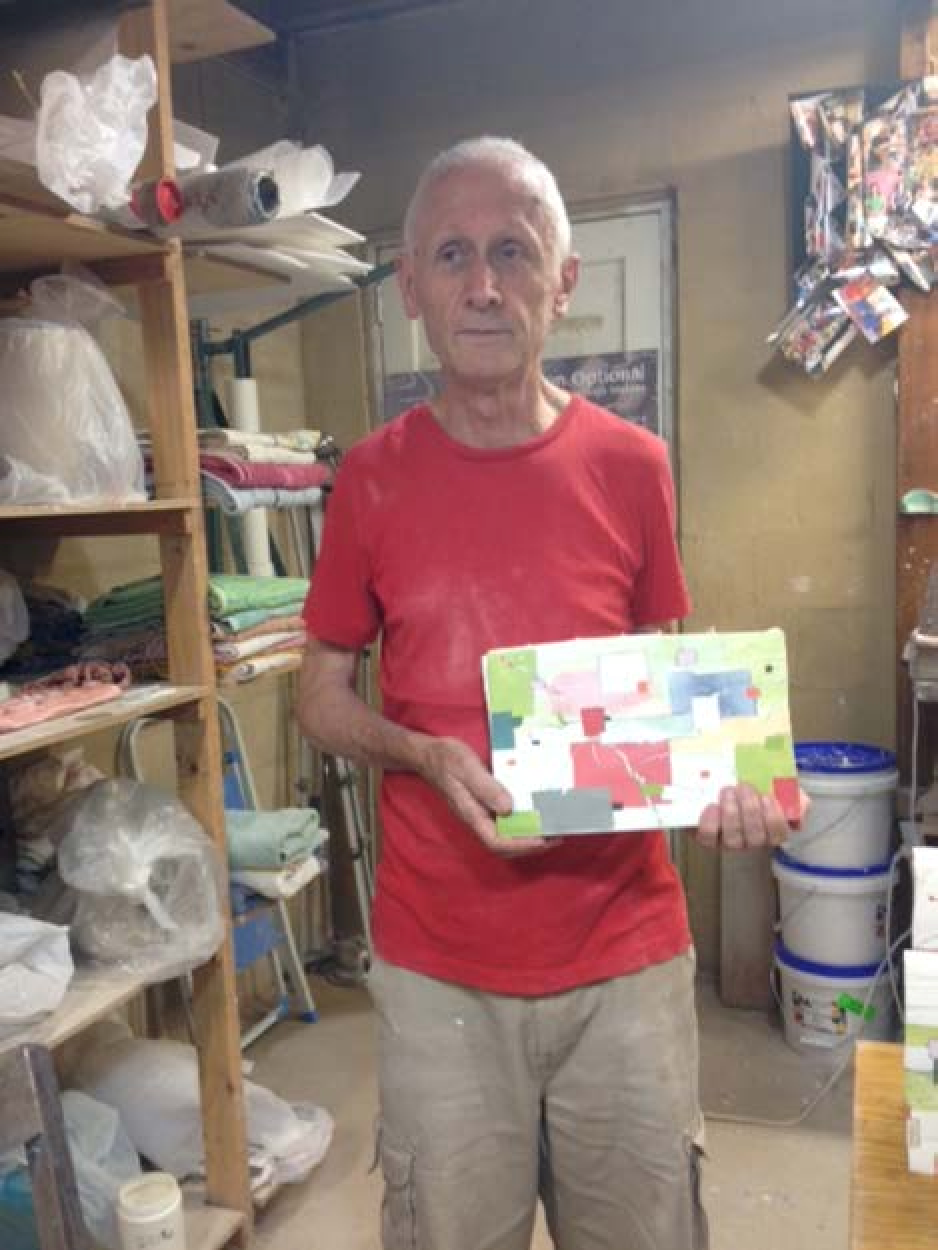
Luckily, the river had subsided from the previous week's floods so that we, my husband, Mike, and myself could drive across the bridge to John's home. He was so kind and welcoming. We were privileged to see his latest laminated work; coloured paperclay slip on a white background, fine inlay work with gestural black lines. Those of us who did his workshop at CCPS last June will appreciate the perfection of John's work. He has three kilns: a small Tetlow electric; a large 3-phase electric Woodrow kiln which he really likes for his type of work; and a large Steve Harrison gas kiln. His wife, Gloria, is currently working with neriage techniques. Although he has solar panels on his roof for domestic use, he would be hard pressed to fire up his 3-phase kiln relying solely on the sun! John plans to do a residency in Hungary this year. He says Hungary has the whitest porcelain clay. I look forward to seeing how this experience will inspire his future work. In the meantime, John is having an exhibition at the Mansfield Gallery. DATES - 12 May to 12 June 2017 LOCATION - Mansfield Gallery 269D Darlinghurst Road, Darlinghurst NSW 2010 +61 2 9332 4379 Ingrid Tristram CCPS Vice President by Ingrid Tristram
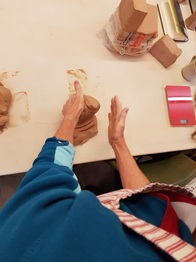
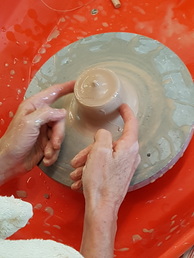
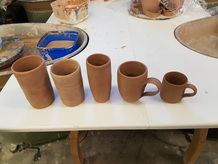
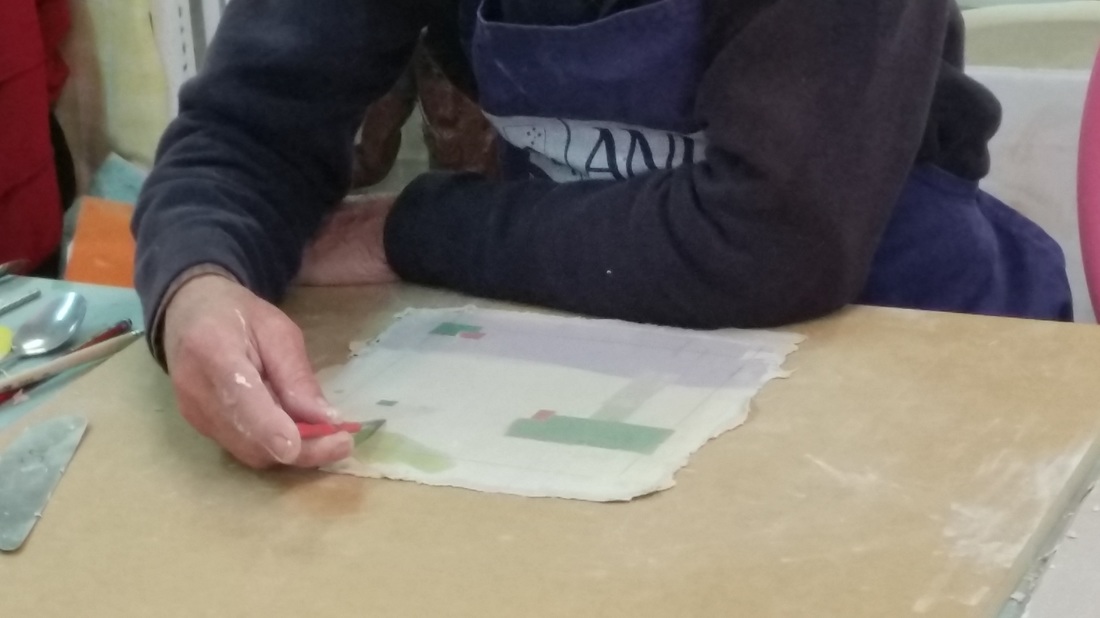
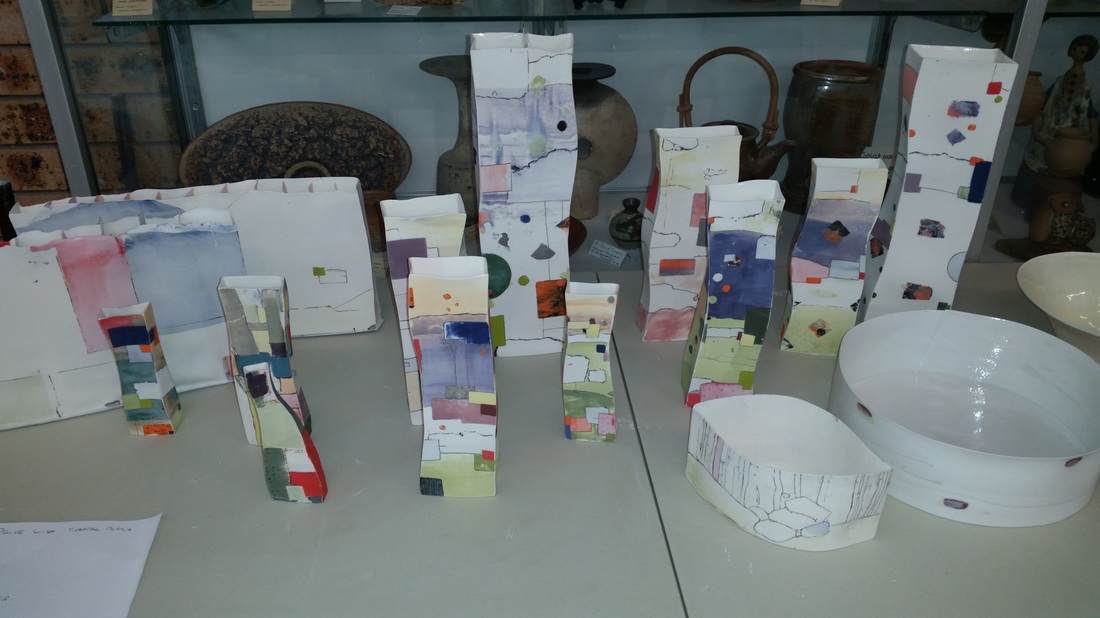
Katherine Mahoney ran a throwing workshop at the CCPS. We expected to get a ‘handle’, so to speak, on throwing techniques and with Katherine’s multiple demonstrations and attention to each of us, we weren't disappointed. We used Keanes 5B clay, a brown clay which has a bit of grog to help us throw more easily. Katherine, for her own work, uses Walker's Superior White Porcelain. Firstly, we spent time wedging clay both the bull's horn and spiral methods. With the bull's horn method it is helpful to hold the ‘horns’ in as you press on the fat bit leaving a ‘nose’ and repeat this roll. The spiral method takes practice - pressing the lump of clay in the top left hand corner with your left hand while guiding the top wedge with your flat right hand. You only need to work and roll this corner and the spirals accumulate in the mass of clay and obliterate air bubbles. Well supposedly! Day 1 task was to throw at least six cylinders weighing 500g each. We practised coning the clay ball up and down. Then we opened it by supporting the outside of the clay ball with our left hands while our arms were well anchored on the wheel frame. Then using the middle finger of the right hand we pushed down and out to the side at a 90 degree angle. Then it is important to cone the clay in and keep it coned in till the end of the throwing. The first lift of the clay is from the base. Fingers soften towards the top. Use "butterfly fingers" we were told! Throwing to the speed of the wheel kept even rings. If finally you wanted uneven rings then you throw up faster than the wheel head speed. If you get an uneven rim use a needle tool in your right hand resting over your thumb of the left hand. Spin the wheel and it will cut an even rim. To make a good rim, the left hand thumb supports the outside of the pot while the middle finger of the right hand moves the clay on the inside to meet the thumb at the top so as not to distort the outside form. Don't let the rim get too thin. When complete use a sponge or chamois to wipe the top smooth. Importantly, Katherine emphasised that in all throwing the diameter of the base dictates the final shape. For example, the ball for a cylinder is compact compared with a broader and flatter ball for a bowl. Well this occupied us fully for Day 1. Day 2 was the time to learn to pull handles for our cylinders to make coffee cups and to practise turning our cylinders. Multiple handles were pulled from a largish lump of clay. Wetting and turning as we pulled handles. We laid them onto broom handles until leather hard. Some people also half pulled handles to attach later to cups and complete the pull on the cup. Katherine demonstrated turning both on a chuck and on the wheel head. If turning directly on the wheel head you dampen the rim and/or place clay small coils for support. Participants introduced Katherine to using Batmate for supporting pots when turning. She had prepared solid chucks for placing a cylinder over the top of it. For a bottle you would make a chuck with a hole such that the bottle would fit upside down to its shoulder. When you turn you look at the inside of your shape and repeat that when you turn the outside. The rough rule is to only turn the bottom third of the cylinder never the rim. We were taught to turn across the base and instead of a foot ring we chamfered the edge, as Katherine said, "punctuation" between the vertical sides and the base. A surform tool is also useful for smoothing out the form. When you take the turned pot off the wheel onto a board, only pick up and put down from the base, that is, don't risk distorting the sides. When you attach a handle, cut the first edge to attach, cut at a slope. Scratch and slip surfaces to be joined. Match the handle to the cup shape. Katherine likes to press the bottom of the handle with two finger presses. Katherine demonstrated throwing bowls off the hump which some of us tried. She cuts the bowls off with a needle rather than pulling a string/gut. Participants were encouraged to throw their own coffee cups in whatever shape they wanted. As we struggled with these procedures which included mistakes, Lisa, one of the participants, said more or less positively, "great things come out of tragedies, sometimes!" Just finally, a few thoughts on glazing. If you want movement choose a fluid glaze. An example of this would be Celadon. Also iron oxide on celadon would run down but it may not on a less fluid glaze. The same glaze on different clays can make a huge difference. Satin matt White on Porcelain is white but on BRT is speckily grey. We all appreciated how supportive and encouraging Katherine was of our efforts. She was also so willing to demonstrate the steps we were learning or reinforcing. Thank you so much for your kindness, help and patience. We were lucky to have this learning experience. Just before signing off, everyone who has participated in the workshops this year has thoroughly enjoyed them. A resounding thank you goes to our brave, hardworking organisers, Clodagh, Jules and Kylie-Rose. 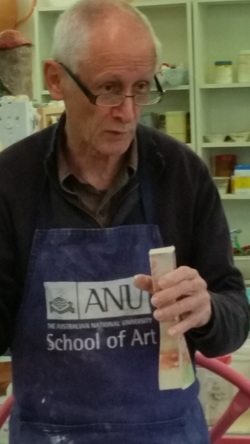 John Tuckwell. Photo by Annette Heidrich John Tuckwell. Photo by Annette Heidrich Report by Lilla Wylie The workshop commenced on Friday evening, June 17th with an informative talk by John Tuckwell, ably assisted by his partner of 40 years, Gloria who was in charge of the slide show. John told us is in his quiet, wry manner of his early days in Sydney’s west where he was involved in the automotive industry, dealing in car spare parts. During the “recession we had to have “in the early 1990’s he found himself needing to find a different direction and moved northwards onto acreage. There he found himself involved in making ceramic garden ornaments. He enjoyed the activity and Gloria encouraged him to enroll for a degree at ANU majoring in ceramics and there he encountered porcelain. He has had a marvelous and passionate relationship with the medium ever since. For those who are unfamiliar with Johns work, John makes very fine, fragile looking vessels. The vessels are made of fine porcelain slip mixed with paper and are decorated with distinctive, abstracted swathes of colour. John describes his pots and their decoration as a personal and emotional response to the beauty he sees around him, especially in Cathedral Rock National Park near Armidale. We were all mesmerised by the delicacy of all the work on display and looked forward to learning as much as we could from John and Gloria who is also a potter (as well as a nurse) over the following days. Saturday and Sunday were amazing days as we were introduced to new techniques and experimented with casting slips with paper mixed into them, laminating coloured slips into the thin set sheets of paper cast slip, and creating vessels of our own. Some of the participants created truly gorgeous pots. John Tuckwell was a wonderful teacher. Report by Ingrid Tristram.
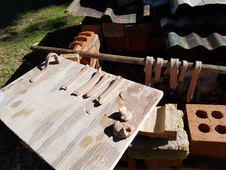
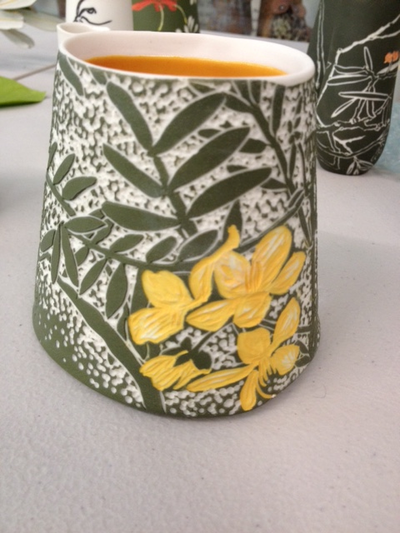
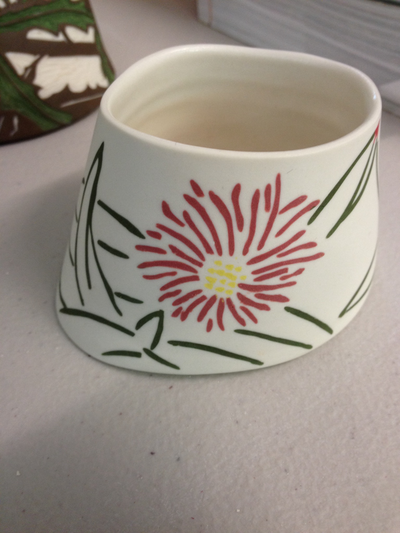
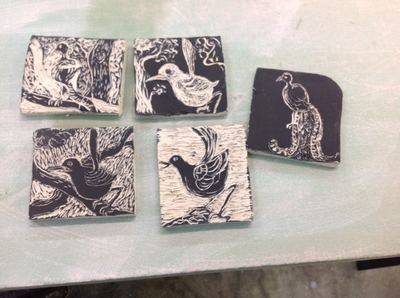
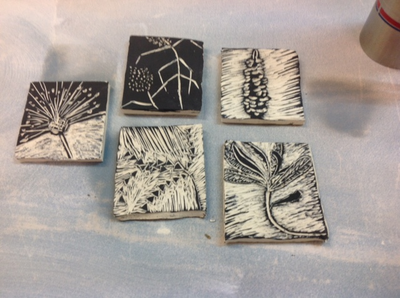
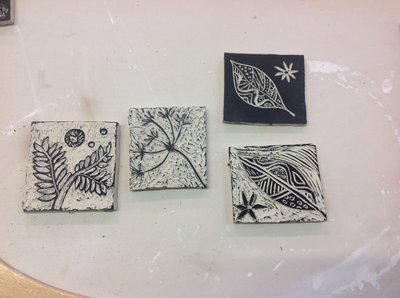
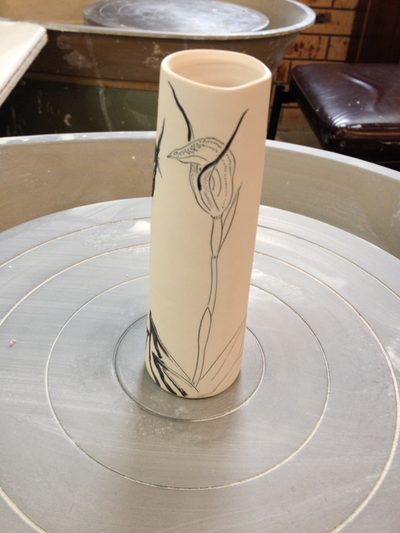
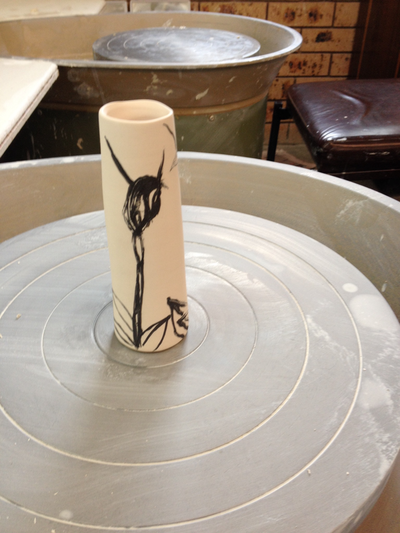
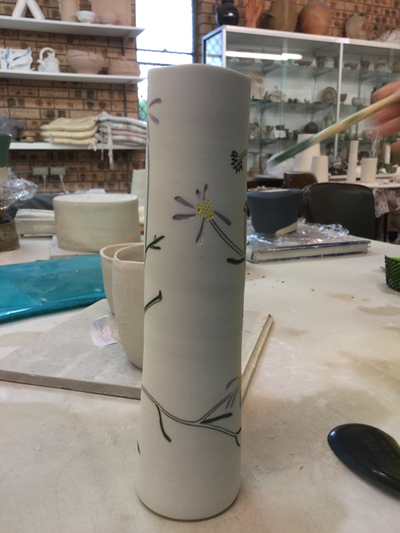
Cathy Franzi stunned us with the beauty of her porcelain pots decorated with Australian botanical plants in a contemporary manner. Over the two days she helped us to make "walls" on the wheel and to distort these before adding a base. She showed us how to use slip and engobes for backgrounds for sgraffito decoration and how to use ink and slip for inlay designs. Cathy herself has recently completed a PhD at ANU. She has studied the local plants around Canberra where she now lives, including designs on her pots of the sixty two orchid species on Black Mountain! She has studied not only the history of plant design in ceramics but also researched botanical drawing from museums both here and internationally and is continuing to study plants in the field. Her ceramics reflect a scientific knowledge, an integration of form and design relating to inside and outside of her pots. We truly felt we were in the hands of an expert this weekend. After Cathy demonstrated her techniques, we all had a go at wheel throwing. We used Keane's Lumina clay which is a midfire glaze Cone 6 porcelain. She, herself, has been using the more expensive Limoges porcelain clay because it is a more creamy white and better for her purposes. We each made a collection of "wall" pieces of varying sizes from about 300g - 600g. She encouraged us to cone up the clay several times in order to smooth out any air bubbles or knots and make sure the clay was centred. Then we opened the clay right down to the wheel head and outwards with one finger leaving the slightest edge of clay inside at the base for joining to a base later. We cleaned clay off the centre of the wheel head. We did not cut the "wall" off the batt at this stage. Later we made bases for our "walls". For this we patted a smallish lump of clay to a cow pat kind of size before rolling it out. Cathy explained that porcelain prefers to be patted rather than pulled. We used wooden guides to help us roll the clay slab evenly. We placed the slab on a batt. We used a rubber kidney to smooth the surface. We placed wet cloth on the smooth slab and made sure there were no wrinkles on the material. Silk is good because it doesn't leave a texture. We placed another batt on the slab covered with cloth and turned it over. Removing the batt now on top, it exposed the raw other side of the slab which we could smooth with water and a rubber kidney. Cathy really liked the variety of mud tool kidneys which are of different stiffnesses and she used them for smoothing the porcelain.Now the slab was ready for the "wall". The cloth is left at this stage under the base of the slab. Next we altered and attached "walls". We put a splash of water around the "wall" of our thrown piece that was still on the batt where we had thrown it and NOT released by a wire. Now we cut the "wall" with a wire and slid it and formed the asymmetrical shape we desired. Then we lifted it onto the prepared base and cut the base slab to fit allowing a small margin to work from the base to the "wall" to join. No scoring of this evenly wet clay was necessary. The small margin left in the throwing on the inside could likewise be joined with a rubber kidney or wooden tool or fingers. The pots were fairly roughly joined and put outside to firm up. Cathy also demonstrated how to throw and join two pots or more in her case. Those who wished, threw two pots for joining later. The first with a base and the second without a base. The rim at the top of the first pot was curved in. The rim of the second pot was curved out so when inverted, the two pots fitted together. Neither pot was cut off the batt. They were put outside to dry, however, care was taken to cover the rim with glad wrap to prevent uneven drying. The following day, the first pot with the base was re-centered on the wheel. Each rim was scored with a toothbrush and a small coil of clay added. The second pot was inverted and placed on top. Only then was the top pot wired off. Now your hand could reach in and throw up and down to consolidate this join. A fine coil of clay was placed on the outside join and further throwing compressed the join until it could not be seen. The second day Cathy demonstrated her her turning technique. She turned her cylinder with deep spiral throwing lines and we turned our joined pots until they were fine and smooth. We also smoothed our asymmetrical walled pots ready for decorating. On the first day Cathy discussed methods of decorating. She had reference books of Lino cut designs, for example: Col Minogue, Impressed and Incised Ceramics; Pauline Green (Editor), Printed Images by Australian Artists 1885 - 1955; and Mathias Osterman, The Ceramic Surface. Cathy had brought a selection of her own pots which were beautiful to handle and we could see both the sgraffito and incised surfaces. She likes to use a scalpel or tool that doesn't leave residual clay in the groove. Incise deeply enough to take the ink. She likes to make her own tools from three cornered wood beaded strips from Bunnings chopped up to pen lengths with a slit made at one end. She cuts strips off a metal kidney which she bends to make a loop or V or whatever shape you like, then it is glued into the slit with araldyte. We all made one for ourselves.The lovely organisers of the workshop had pre-made leather hard tiles coated with a black slip. We were able to experiment with trying a variety of sgraffito marks: lines and textures,and also playing with black shapes on white and white on black. Cathy prefers to draw directly onto the pot without first drawing. She demonstrated inlaying with Kera ink. Kera underglaze ink can be bought online from Pottery Supplies, Brisbane. When a pot is bisqued, submerge it in water and use wet and dry sandpaper, about 400 grade, to smooth it and take off excess ink. After the final firing you can use 800 and 1200 wet and dry sandpaper. She also uses slips into incised lines. With slip it is necessary to overfill he incised line to allow shrinkage as the water content dries off. Colorants can be added to slips. Cathy suggested 10% stain, and 5% Frit 4110 added to the slip. She added 25g to 250 mls slip so using wet and dry measurements OK. Once a slip has some glaze materials added to it, it becomes an engobe. Cathy has developed her own engobes that give the sheen she likes but as a starting point here are two recipes: Cone 6 1200 degrees C. Midfire. White 30%. Kaolin 30%. Ball Clay 20%. Potash Feldspar 10%. Silica10%. 10%. Zirconium Silicate Cone 01- 1 1140 - 1150 degrees C. 80%. Ball Clay 20%. Molochite ( which is calcined Kaolin) 10%. Frit eg. 4193 Finally Kylie Rose quickly went around the group requesting comments on the workshop and you can see how much Cathy Franzi's workshop was appreciated. Clodagh: Valued consolidating techniques for joining porcelain pots on the wheel Denise: Learned about inlay techniques Lynne: Re-ignited interest in fine work Shirley: Loved cutting and altering forms Annette: Appreciated making shapes from altering forms and 2D design working with background and foreground Jasmine: Sharing ideas with everybody such as in the tiles we decorated Sandy: By treating porcelain not so preciously it took the scaryness out of it. Appreciated the love of Australian plants and unusual to see native plants on pots in a more contemporary way Carol: Could see how other skills, such as, drawing and the use of colour, could be combined in this process."........pure pleasure Virginia: Valued the appreciation of our plants and endangered species, realisation of a dream to value what we have more.......thank you Kylie Rose: Noted that there was an intellectual engagement in the scope of ideas and the process I hope I have not misrepresented the verbal comments but Clodagh also summed up what we all thought by recognising the holistic approach where Cathy considered design, beauty and meaning of her pots. Cathy's pots are of environmental significance based in a knowledge of history and what is happening in our contemporary world. Thank you so much Cathy! Pictures by Ingrid Tristram. |
Welcome to the CCPS blog!Central Coast Potters Society is a non-profit, community organisation of like-minded volunteers who love clay. Categories
All
Archives
November 2018
|


 RSS Feed
