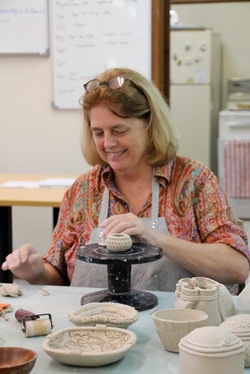
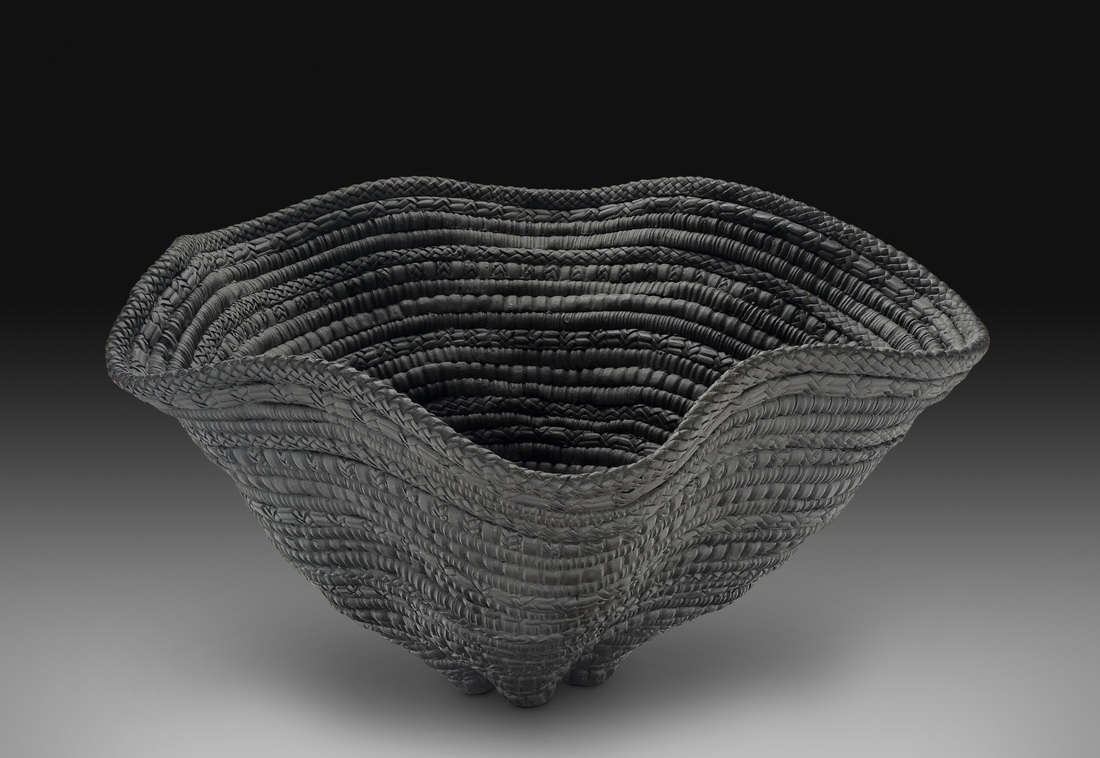
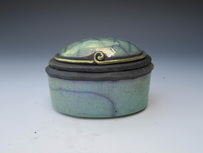
 Using slab sections, flattened, hollow and tiny, extruded coils for decoration, Candone creates beautifully decorated pots for rakuing, normally working at quite a large scale. Her choice of decorating elements includes serrated triangle metal tools, cones from trees, patterned rollers, printing blocks, and other items to create a repeat, indented pattern. Candone works on several pieces at a time as she progresses to each phase of adding the next component. Using Keane Ceramics’ No.7 clay, the first demonstration was a small bowl. Candone pressed a rose patterned stamp into a round slab of clay (she prefers to press the clay onto the stamp rather than stamping the clay). Creating a slight dome, this section was used for the base of the bowl. A coil was flattened, decorated and using a parallel cutter (a handy instrument with two adjustable blades runnning parallel), was cut to about 3cm in width and joined to the base by scoring and painting the edge with slip. The decoration faced the inside of the bowl. More slabs were made, decorated in the same manner and attached to each section, working the sections outwards to create the bowl. The next piece was made using a bowl mould. Cutting a fairly thick slab a little larger than the mould, Condone placed it over the mould and gradually worked it down to the base, using a metal kidney, making sure to periodically lift the clay to allow air into the mould. This procedure eases the clay in and enures no folds are created at the rim. After the pot is dry enough to handle, it is removed and any excess clay trimmed from the edge. A hollow coil is then added to the rim. Using a print maker’s roller, a coil is flattened, cut to size with the parallel cutter, and decorated. The decorated side is then turned over and the long edges of the flattened coil joined to create a hollow coil. The edge of the clay pot is then scored and painted with slip and the hollow coil is fixed to the rim of the bowl along its join. Each end is cut on a bevel and joined. Where the hollow coil joined the clay bowl, Candone ran a skewer around making a small groove in which to place a very narrow, extruded coil. Candone then went on to show us different types of boxes - oval, round and square. An oval box with a domed lid, with decorations on the side and lid, was created by taking a slab of clay, approximately 35cm long by 8cm wide, decorating on one side, joining the ends together and forming an oval cylinder. Working the top and bottom inwards and gently stretching the sides to ‘pillow’ it out. The cylinder was placed on another slab of clay to mark the size of the base. The base was cut to size, the bottom edge of the piece scored and painted with slip and the base attached to it. The base was tapped for a more secure join and the outside edge paddled to complete it. A coil was flattened and cut to make a flange on the inside opening of the pot, joined and fixed when leather hard. Another decorated slab was cut for the top opening. Candone worked this piece into a domed lid. She flattened a coil and formed a flange for the lid, fixing it to the dome section. Then, using a flattened coil, measured it around the opening of the pot and formed a lip, fixing it to the underside of the flange on the dome lid. After drawing a groove between the dome lid and flange, a narrow, extruded coil was placed for decoration. Candone made several boxes always leaving time for sections to become leather hard before use. She separates her boxes and lids in the firing. One of her outstanding pieces was a fluted, basket-like pot created from hollow coils. She started off with a small three cornered slab as the base, gradually adding hollow coils, moving outwards toachieve a fluted effect. An additional decorating technique Candein uses is to cut out sections from the coils making an open pattern. She likes to leave this kind of pot without glaze, achieving a totally black finish fromher raku firing. To make a plate, Candone tore a slab of clay into several pieces, placing one on top of the other and rolling the clay out with a rolling pin to a desired thickness. This made the edges of the plate very interesting. She then formed a shallow in the middle, decorating around it with an extruded coil for the gold glaze. The final demonstration kept us enthralled. Candone took a slab of clay, folded it in half like a bag and, holding the top, turned the sides in and started to work downwards on the clay until she formed, what looked like legs, on each corner of the piece. She then turned these “legs” inwards until they looked like a couple of people kneeling. Candone kept working the piece until it was formed into tubular shapes. She cut the top to neaten it and then joined decorated, hollow and rolled coils, building up the form to include her tiny, extruded coil for the gold lustre decoration. The mixture of black fired raku clay, decorations of gold, turquoise and crackle glazes make her pots outstanding. It was evident Candone enjoyed teaching and demonstrating her work and her patience was remarkable. An atmosphere of calmness pervaded the workshop and I am sure we were all encouraged to enjoy our handwork with clay and to go that extra distance to produce a pot finished with care. Check out her website: http://www.candone.com Jean Miller Images of Candone’s work taken from http://www.candone.com/index.html
0 Comments
Leave a Reply. |
Welcome to the CCPS blog!Central Coast Potters Society is a non-profit, community organisation of like-minded volunteers who love clay. Categories
All
Archives
November 2018
|
 RSS Feed
