
|
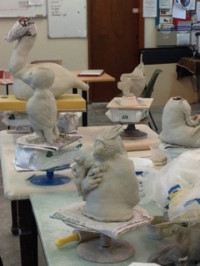
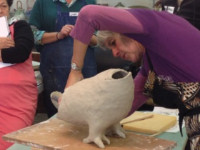
From all accounts everyone had a great time at the recent Bev Hogg workshop. Ingrid Tristram kindly wrote up a report and an extract follows. Ingrid's full report will be up on our Blog Page on the CCPS website. Bev Hogg threw us in the deep end with forming animal sculptures before we could think to say what? how? now? With her encouragement we bravely embarked on a new road and it was amazing how the group progressed in such a short time. Her enthusiasm, kindness and guidance to every individual were really appreciated. At her Friday evening presentation Bev spoke about her work noting that although she depicts animals and birds they must also say something more than just being a representation. For example, she showed her work of two wall plaques where one shows birds that have adapted to living with humans and another plaque of a flight of birds departing who cannot easily survive and some of whom are under threat of extinction. She plays with size, for example, the delicate finch may be enlarged to aggressive proportions. Often it is humour that can underline serious issues. She emphasised how important it is to give yourself time to reflect and develop your ideas The following two days of the workshop were filled with sound advice, working on our own sculptures and playing with surface textures on tiles. She emphasised the four P's: play, process, practice, persistence. Take risks and be prepared for failure too. She quoted Picasso who said. "Inspiration exists but it has to find you working." Bev, herself, will often work on three different sculptures at the same time. Also she encouraged us to consider making another sculpture the same because we would have ironed out problems from the first effort. We were given tips on sculpture making and we preactised texture techniques making and decorating tiles. Thanks Bev for a most imformative workshop.
0 Comments
Marienne Stollery ran a very successful Raku Firing with us and we wish to thank her so much for her care and expertise.
Firstly, however, she emphasised the OH&S aspects of this crazy, unpredictable and exciting way of firing. You must wear covered in shoes long sleeves and long pants preferably of non synthetic material. After glazing must make sure you have thoroughly cleaned glaze off the bottom of the pots. Only allocated people firing should be near the kiln. When it is time to take your hot pot out you should have worked out the most direct route from the kiln to your reduction bin such that you do not cross someone else's path. Of course, you need to wear long leather gloves and use tongs. Glazing Pots Marienne and Dean Mc Coll had made up a variety of glazes prior to the Raku Day. It is good to glaze a day before but we dried our pots on the day by placing them in a box with a fan heater on low blowing into it. The glazes included, lemon lustre, white crackle, blue, plum, coppers. The recipes for these glazes are in a folder in our library. Marienne 's advice is:- It is all too easy to simply dip your pot in a bucket of glaze and hope for the best. Much better to work out your glaze plan before you arrive, while there are no distractions. Put as much thought into glazing as you did in making the piece and you won't be disappointed. Record what you have done. Decorating Marienne showed us some techniques for decorating:- 1.Masking tape or sticky labels and cutting out shapes with a Stanley knife and sticking the shapes onto your pot then glazing. You remove the tape before firing. Where the shapes were it is not glazed and is left black after reduction. 2. a slip trailer filled with craft glue can make marks on pots prior to glazing. 3. String tied around pots before glazing can make marks. 4. Wax resist, Marienne likes to use Vaseline mixed with a little turps for this because it doesn't run and it dries quickly. 5. Permanent pens can act as a resist, crayons too but they are more problematic. Kiln We used a kiln that sat on a brick base with a hole facing the gas bottle for the gas burner to be placed. It is important that air is allowed around the burner. You do not stick it right into the kiln. A piece of shelf was placed at the back of the kiln so that when the flame hit it, it bounced off sending the flame around the kiln. The flames should not be directed at the props holding the shelf up. As Marienne pointed out, there was plenty of room vertically in the kiln so tall shapes could be fired more economically than little pots. Marienne placed a short stainless steel cylinder on the top opening of the kiln to act as a chimney to help draw the air through. Firing Firstly, make sure the regulator is threaded into the gas bottle properly (not cross threaded) with no gas escaping. Once you turn the gas on at the bottle you then operate the pressure from the regulator.. Use paper or a long match to light the burner facing into the kiln. The first firing usually takes longer than subsequent firings when the kiln is already hot. It took us one hour. In that time the regulator was slowly moved from 1 Psi to 4 psi no more. When the kiln has reached 1000 degrees centigrade hold it at that temperature for 3 to 4 minutes to even out the bubbles in the glaze. When lifting the kiln up remember to keep it straight so as not to let the fibre touch the pots. Tips Sometimes the burner will make splutter noises if it has air or moisture in it. Clear it by turning the flame up to high for a few seconds facing away from the kiln making sure it is safe to do so. If you brush detergent mixed with a little water over connections of the burner to the cylinder and it bubbles this indicates the gas is leaking. When changing over to another gas bottle you must first turn the knob on the bottle off. Reduction in tins I place a handful of sawdust in the reduction bin but because I don’t want the sawdust to touch my pot in case it pits the glaze, I sit my pot on a piece of shelf to raise it up a little then put in lots of shredded paper around the bin., I find shavings are better than really fine sawdust ,which should only be used when wearing a mask. Then place a tight fitting lid on top .When burping the bin as soon as you lift the lid the paper will light and flame up. You then throw a handful of sawdust on the pot and put the lid back on. Great care needs to be taken doing this. Pots need a minimum of 15 minutes reducing before opening the tin. Marienne says she doesn't use shredded newspaper as she is not sure if the burnt ink gives off toxins. However, she does use other shredded paper. You should wear a mask if you use fine sawdust . Never place used reduction materials in the plastic Otto bins where they could reignite and start a fire in the bins. Reduction in the kiln Marienne showed us, alternatively, how to reduce in the kiln. At 1000 degrees centigrade, open the kiln to cool it quickly to about 730 or 750 degrees by looking at the pyrometer inserted in the hole on the side of the kiln. Then close all gaps in the kiln with fibre and leave the burner on low so that you soak the kiln for 5 minutes. Now you are reducing by starving the kiln of the oxygen. Check out references in our library for Raku. Report by Ingrid Tristram edited by Marienne Stollery Thank you Marienne for a very informative workshop. This was held on October 31, 2015.
A glaze quite simply is a thin glassy covering fused to the body of a pot. It is composed of a glass former, fluxes, a glass stiffener and colourants. When fired the ingredients melt together to form a glaze. Prepare the work space Gather what you need before beginning to glaze. You may need pouring mugs, suitable glaze containers for awkward shapes, water, sponges, stirrers, glaze tongs, sticks, large containers. It is all too easy to dip your pot in a glaze and hope for the best. Put as much thought into this process as you did in making the piece and you won’t be disappointed .Record what you have done. Clean the ware before glazing to remove dust. Dust can cause pin holes in the glaze or worse, crawling .Remove any rough bits. Bisqueware should not be fired higher than 1000 degrees otherwise it won’t be porous enough to accept the glaze .If a piece has been fired higher, heat it up in the oven first. A small cup of whiting placed in the kiln will help to control sulphur fumes .It can be re used. Glazes To make up a glaze from a recipe weigh out all the ingredients carefully. Tick them off. Wear a mask as the fine powder becomes airborne. Lightly mix the dry ingredients together and sprinkle into the measured amount of water. Roughly 1 kilo of dry weight to1 litre of water. Leave to slake overnight. Put through a fine sieve 100-120 mesh taking care that all ingredients go through. I always take some water out of the bucket before stirring ,mix it up, test with my finger and a bisque tile –fired no higher than 1000. Do not use a setter which has been fired in the glaze kiln. If too thick I re add the water bit by bit. A simple guide to test the thickness is to dip a dry finger into the glaze fairly quickly. If you cannot see the outline of your finger then the glaze is too thick If you can see the colour of your finger through the glaze it is too thin. The shape of your nail should be discernible through an opaque layer of glaze. Very scientific I know! Decision time Do you glaze it or bin it? Give it some thought. If you hated the pot before you glazed it, it is highly improbable that you will love it later, after you paid to have it fired. Stir glaze which settles quickly and keep it stirred all the way through the process. Workshop glazes may need sieving. Areas of the pot which should have a thinner coating (like the holes on a teapot) can be painted with water first. There are mainly 5 ways of glazing. Raw glazing Where the leather hard pot is carefully glazed inside, put aside and then glazed on the outside. It is the fired very slowly to s/w temp. This method is tricky and cannot be used at the workshop or in a kiln with a normal gloss firing. It is the least used method. Painting This is often used in e/w firing with commercial paint on glazes. At least 2 coats are needed. Spraying Expensive to set up .A special spray booth with a turntable and exhaust fan is needed Lovely layered effect is possible. I used to use an old Electrolux vacuum cleaner on blow not suck with good results. Dipping (most common method) Best guarantee of an even coating and the quickest. Using tongs so as not to leave fingermarks, dip pot in and out emptying the glaze from the Inside. Don’t hold the pot in for too long .Don’t let the pot touch the sides of the bucket. The longer you hold the pot in, the thicker the glaze will be until it is no longer porous. Don’t touch until the shine has gone off the glaze. When dry enough to touch but still damp, clean the bottom (I press pot onto a stiff sponge and turn to get a neat line) Take care not to contaminate the glaze with a dirty stirring spoon. Hot wax smells and is dangerous in the studio.Cold wax takes too long to dry. Check bottom for any glaze missed. Clean holes of glaze Unsightly runs…fettle these and tongs marks off Practice will indicate just how thick/thin the glaze should be. Success in dipping depends to a large degree upon experience and judgement .You will not become an expert overnight. You may also be restricted by the size of your pot or glaze bucket. Thin walled pots Very thin walls absorb more water and the glaze deposited will be less .If you make very thin pots the glaze should be thicker. Double dipping Never double dip the whole pot. The glazes when used on their own are stable but 2 stable glazes together can run right off the pot! Try double dipping the top edge only. Apply 2nd glaze as soon as shine has gone to prevent it from crawling. Opaque Glazes When using an opaque glaze ie non transparent by addition of 10% tin oxide or 7% zircon oxide the glaze should be a little thicker A matt glaze should also be a little thicker and not over fired or it will lose its mattness. A clear glaze is thinner. Lumps, drips, finger marks, and double dipping lines can spoil the look of the glaze. Do your best to avoid them in the first place as fixing up mistakes is time consuming. Drips can be fettled back. Double dipping lines and finger marks can be touched up with a brush. Do this when the glaze has dried. Pouring Large odd shapes are mostly glazed by pouring the glaze around the piece quickly and evenly. Place the pot on 2 sticks across the bucket or a wide container to do this. The container can also be put on the wheel head to turn slowly. I prefer the glaze to be thinner as overlaps are too thick. This is a good method but harder for students to do. As the glaze thickens around the rim, I wipe off and reglaze. When the pot comes out of the kiln you will need to smooth off its bottom so as not to scratch a good surface .Lids and galleries can be smoothed with oil to get rid of the grating sound. ROTARY CLUB RAFFLE - Draw - 16 February 2016
How many tickets can you sell? Books of tickets available for CCPS members to purchase, to raise much needed funds for workshop renovations. Collect books from Denise Gonzales at the AGM or contact her on 040 508 402 or via email at [email protected] Tickets are only $2.00 each and you could win! 1st Prize - $3,000 travel voucher, Flight Centre Bateau Bay 2nd Prize - B&B, Pullman Magenta Shores Resort 3rd Prize - $150 voucher, Gem Design Jewellers, The Entrance 4th Prize - $100 voucher Water’s Edge Seafood Restaurant, The Entrance Jump on board and collect during the summer break.
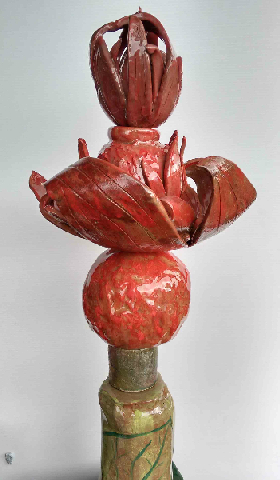
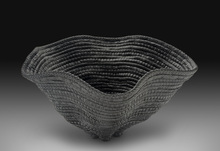
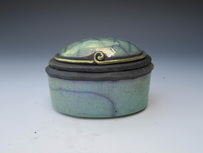
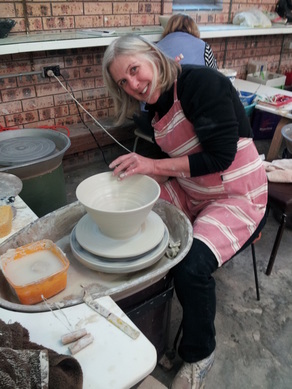 Sandy Robinson throwing a large bowl. Photo: Claire Halon Keiko’s workshop was an opportunity for experienced potters to extend their throwing skills, and by the end of the day they had all been given the chance to not only revise basic throwing skills, but also to work on a technique previously identified as a personal area of interest. This was a wonderful example of a well- balanced workshop, with demonstrations of basic skills and extension skills; and of hands on and observational activities. 1. Using Keane Stoneware 7, Keiko began the session by demonstrating firstly the making of a bowl, covering centering the clay, raising sides, and using a sponge in the right hand to assist in the process. The next demonstration was making a cylinder, with emphasis on raising the top inward so that it doesn’t collapse, and using a straight tool to keep the side straight. Everyone then made a bowl and a cylinder, which were put aside to be used later. 2. After a turning demonstration by Keiko, participants applied the demonstration skills by each turning a pot that Keiko had prepared the previous day. 3. Keiko sent a survey to each participant prior to the workshop, and this was used to identify the areas of most interest to each member of the group. By analysing the completed surveys, the next demonstrations by Keiko were led by the findings : * throwing a large pot, using about a quarter of a bag of clay* joining two pots to make a taller/larger form. Techniques and skills for making large pots included: using a bat on a clay base; patting the clay down – it needs to be softish, hard clay is too difficult to work with; lock elbows in the groin; techniques in opening; using a slow wheel, you don’t need excess speed; the thickness when raised should be about one centimetre; trimming and turning make the important difference. One of Keiko’s great hints on the day was, “ If you can make a medium sized pot, you can make a large one”. Right! Motivation is always important! When joining two pots, one of the useful hints was to make both pots on the same day, as they will then dry at the same rate. 6. Keiko also showed us how to mix clays on a pot using different coloured clays. A cavity or cavities can be made on the sides of the pot, then the contrasting clay squeezed in, or inlayed, then the pot thrown. 7. The next area covered was turning. Things to remember included checking that the clay used to hold the pot onto the wheel should not be too soft, and it should be pushed on to the wheel, not on to the pot; you can turn the basic sections of the pot and leave it to dry a bit more before finishing the turning; use your finger or a tool to indent then raise a ridge, as a guide for glazing. It was then time for everyone to turn pots previously made by Keiko, and everyone was encouraged to turn in their own individual style. 8. After lunch, there was a Show and Tell session, where previously made pots brought in by participants were shown, and Keiko gave individual feedback where it was sought. 9. Finally, it was time for participants to work on their previously identified area of skill improvement, and the large pots, joined pots, and variations to the basic pots were a testament to the planning and demonstrations that Keiko managed to include in this action packed day. Participants were reminded that, “The wheel is a tool, so use it”, for example, in joining, scoring, brushing on slip, and a myriad of other uses. It was amazing that so much was achieved in six hours. The day was, of course, a success, due to the organisation, pre- planning, and attention to detail that Keiko applied to the program of skill presentation, and to the identification of the needs and wants of the participants. A final reminder from Keiko, “It is important to tell yourself what you are going to do, then do it.” Thank you Keiko, this is a good life lesson, as well as something we can all apply to those moments where we need that extra confidence to move our skill base to the next level. Your presentation did this on many levels. Claire Halon 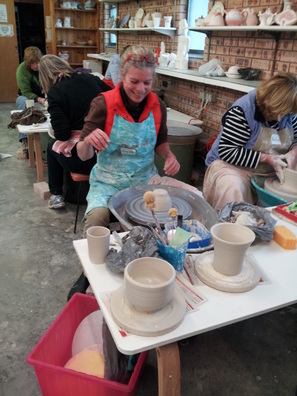 Annette Heidrich learning how to join 2 pots. Photo: Claire Halon  In April this year to commemorate 100 years since the ANZAC Gallipoli landing, CCPS became involved in making 100 ceramic poppies for the Gosford Poppy Project, which was initiated by Gosford City Council. The red poppy is a symbol of the Gallipoli battlefields and poppies were made in fabric, yarn and clay and hundreds were installed in Gosford Rotary Park for the week surrounding Anzac Day and made an impressive display. We had three days of making poppies and it pulled in a wide range of members some of whom I had not met before. The Poppy Project gave us an opportunity to work as a team on one project and were fun, creative occasions filled with chatter. Thank you to the members who rolled and cut the clay, the members who assembled the poppies, the members who glazed and stacked the kilns. Thanks to those who fired and unpacked the kilns and those who drilled and glued in the stems. Then came the delivery and later the collection of the poppies. Quite a team effort, and yes it was definitely worth it! Some of the poppies with now be donated to Gosford City Council for future tributes to the soldiers of World War 1, some will be donated to the Central Coast interactive War Museum and be on permanent display, and a small number will go to Keanes who generously donated the clay for the Poppy Project. 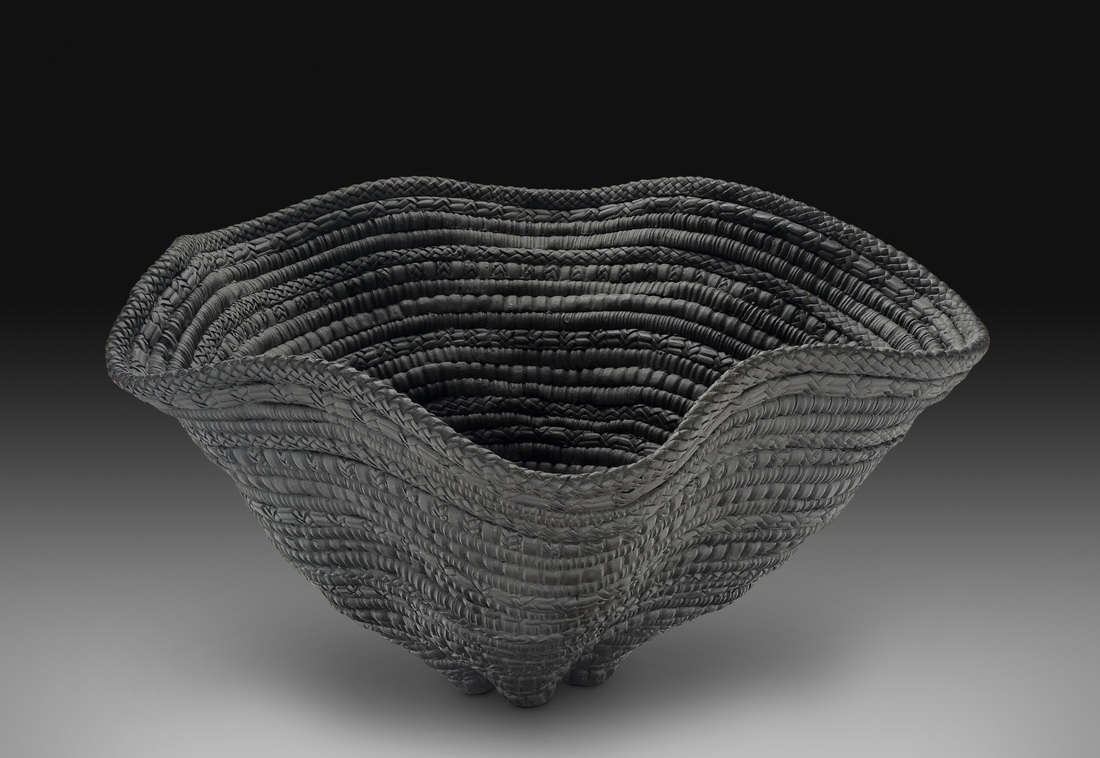 Candone’s hollow coil bowl ‘Cesta La Moraleja’ 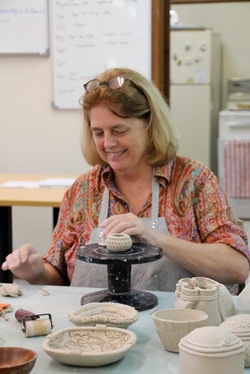 Using slab sections, flattened, hollow and tiny, extruded coils for decoration, Candone creates beautifully decorated pots for rakuing, normally working at quite a large scale. Her choice of decorating elements includes serrated triangle metal tools, cones from trees, patterned rollers, printing blocks, and other items to create a repeat, indented pattern. Candone works on several pieces at a time as she progresses to each phase of adding the next component. Using Keane Ceramics’ No.7 clay, the first demonstration was a small bowl. Candone pressed a rose patterned stamp into a round slab of clay (she prefers to press the clay onto the stamp rather than stamping the clay). Creating a slight dome, this section was used for the base of the bowl. A coil was flattened, decorated and using a parallel cutter (a handy instrument with two adjustable blades runnning parallel), was cut to about 3cm in width and joined to the base by scoring and painting the edge with slip. The decoration faced the inside of the bowl. More slabs were made, decorated in the same manner and attached to each section, working the sections outwards to create the bowl. The next piece was made using a bowl mould. Cutting a fairly thick slab a little larger than the mould, Condone placed it over the mould and gradually worked it down to the base, using a metal kidney, making sure to periodically lift the clay to allow air into the mould. This procedure eases the clay in and enures no folds are created at the rim. After the pot is dry enough to handle, it is removed and any excess clay trimmed from the edge. A hollow coil is then added to the rim. Using a print maker’s roller, a coil is flattened, cut to size with the parallel cutter, and decorated. The decorated side is then turned over and the long edges of the flattened coil joined to create a hollow coil. The edge of the clay pot is then scored and painted with slip and the hollow coil is fixed to the rim of the bowl along its join. Each end is cut on a bevel and joined. Where the hollow coil joined the clay bowl, Candone ran a skewer around making a small groove in which to place a very narrow, extruded coil. Candone then went on to show us different types of boxes - oval, round and square. An oval box with a domed lid, with decorations on the side and lid, was created by taking a slab of clay, approximately 35cm long by 8cm wide, decorating on one side, joining the ends together and forming an oval cylinder. Working the top and bottom inwards and gently stretching the sides to ‘pillow’ it out. The cylinder was placed on another slab of clay to mark the size of the base. The base was cut to size, the bottom edge of the piece scored and painted with slip and the base attached to it. The base was tapped for a more secure join and the outside edge paddled to complete it. A coil was flattened and cut to make a flange on the inside opening of the pot, joined and fixed when leather hard. Another decorated slab was cut for the top opening. Candone worked this piece into a domed lid. She flattened a coil and formed a flange for the lid, fixing it to the dome section. Then, using a flattened coil, measured it around the opening of the pot and formed a lip, fixing it to the underside of the flange on the dome lid. After drawing a groove between the dome lid and flange, a narrow, extruded coil was placed for decoration. Candone made several boxes always leaving time for sections to become leather hard before use. She separates her boxes and lids in the firing. One of her outstanding pieces was a fluted, basket-like pot created from hollow coils. She started off with a small three cornered slab as the base, gradually adding hollow coils, moving outwards toachieve a fluted effect. An additional decorating technique Candein uses is to cut out sections from the coils making an open pattern. She likes to leave this kind of pot without glaze, achieving a totally black finish fromher raku firing. To make a plate, Candone tore a slab of clay into several pieces, placing one on top of the other and rolling the clay out with a rolling pin to a desired thickness. This made the edges of the plate very interesting. She then formed a shallow in the middle, decorating around it with an extruded coil for the gold glaze. The final demonstration kept us enthralled. Candone took a slab of clay, folded it in half like a bag and, holding the top, turned the sides in and started to work downwards on the clay until she formed, what looked like legs, on each corner of the piece. She then turned these “legs” inwards until they looked like a couple of people kneeling. Candone kept working the piece until it was formed into tubular shapes. She cut the top to neaten it and then joined decorated, hollow and rolled coils, building up the form to include her tiny, extruded coil for the gold lustre decoration. The mixture of black fired raku clay, decorations of gold, turquoise and crackle glazes make her pots outstanding. It was evident Candone enjoyed teaching and demonstrating her work and her patience was remarkable. An atmosphere of calmness pervaded the workshop and I am sure we were all encouraged to enjoy our handwork with clay and to go that extra distance to produce a pot finished with care. Check out her website: http://www.candone.com Jean Miller
Images of Candone’s work taken from http://www.candone.com/index.html
 www.ashleyfiona.com ASHLEY FIONA McHUTCHISON - Saturday 14 February 2015
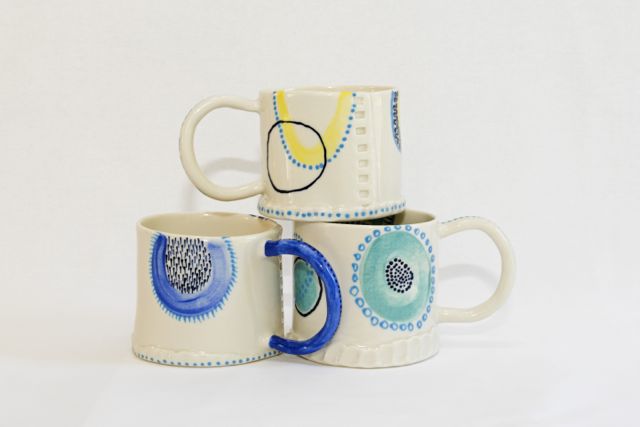
Ashley Fiona McHutchison hand rolls thin slabs of master blend porcelain clay in the manufacture of exquisite beakers, mugs, cups and sugar bowls with spoons, which she decorates with under glaze. Samples were displayed for us to marvel at and purchase. She had a simple, neat set up and keeps her workspace clean. A board covered with a pillow slip to work on, rolling pin, foam to place work on, heat gun or hair dryer, slip, bucket of water, sponges, kidney, small brush, needle, knife, and wire brush. Ashley showed us drawer liner plastic cut into templates and used a flat-sided kidney to smooth this evenly, gently easing the bubble-textured side into a hand-rolled slab, transferring the pattern into the clay. She then traced the mug shape template with a needle, removed the template and using a knife, cut out the traced shape, beveling the edges that are to be joined - a lip for the mug can be made by wiping a kidney over the edge of the clay. She slipped and scored the area to be joined, draped the slab around the rolling pin and joined the slab by gently rolling the join together, then turned the rolling pin until the join was on top. She pressed the end of a chopstick several times along the line of the join, making a pattern and strengthening the join. She then placed the cylinder on top of a piece of foam, to reduce handling, and to keep the shape solid. To finish the join, she ran some slip inside and outside the join with a brush to consolidate it and to remove cracks. It made a very neat join. Sitting the mug on a largish sponge with a tool either side to stop it from moving, Ashley measured the length of the handle. Her hand built handles have a pulled look. She rolled a coil, and using a small tool pressed it length wise into the coil 3 times, then trimmed the edges. She places the handle to the left of the mug seam - better for right-handed drinkers. The handle is added after marking position, slipping and scoring the beaker, pinching and pushing with index finger and thumb to attach. As this is happening the other hand is placed inside for support. A chopstick is rolled over the clay to help attach the handle and smooth clay, finally painting slip over to neaten and finish. Ashley leaves a 5cm width from top to bottom of handle. It is important it fits the hand and is balanced with the size of the mug. Next, using a beaker template, Ashley demonstrated how she works with darts. When cutting the darts, the dart edges were beveled. The cylinder join was worked the same as the mug. Don't press too hard with the rolling pin or the porcelain will crack. The darts were then joined, slightly overlapping the clay, pressing together and smoothing. Ashley used scissors to cut excess clay from the dart joins. The circle base was made using a slab, imprinting the bottom of the cylinder on the slab for size, then cutting out the circle. Ashley has a lovely stamp which includes her web site, she pressed this into the middle of the base circle. To join the base she passed her sponge over the base of the cylinder, slip and scored the slab with the wire brush, lined up her stamp with the seam, placed the base on top of cylinder and used her roller to compress it onto the cylinder. When she was happy with this she painted the inside join with slip. The teaspoon, to go with the sugar bowl, is also a template. A thumb print forms the scoop. Ashley was very attentive to moisture content in the slab as consistency is extremely important. She uses a heat gun to make the porcelain a usable consistency when too wet and a plastic lidded container with wet plaster in bottom to store green ware. In her practice Ashley uses a small production line technique, rolling a series of slabs and then using the first slab as it becomes more solid. Cracking is her biggest enemy. She fires to cone 9 or 10 (1240˚C to 1250˚C) using Chrysthos underglaze on green ware applied using a slip trailer, and sponge stamps followed by a clear Cesco brush on glaze, which she thins in order to dip as well as brush on. Ashley's trick for small cracks - embellishments. A small rectangle of clay is added when small cracks will not repair. These embellishments add to the quirkiness of the work. Ashley's tips
The first demonstration of the year was a joy to attend. I was impressed by Ashley Fiona's good eye, steady hand, clean and organised work area, and well-presented, interesting demonstration. She is thorough in her practice, meticulous in her work and well organised. Thank you Marienne for organising it and the lovely morning tea. Lesley Weber Don't miss the opportunity to call in to our member Valerie Hill's studio this weekend. She is participating in the 5 Lands Art Trail and her new studio has lots to offer. Look for the orange flags to guide you. Val will open her studio between 11am and 5pm both Saturday and Sunday. 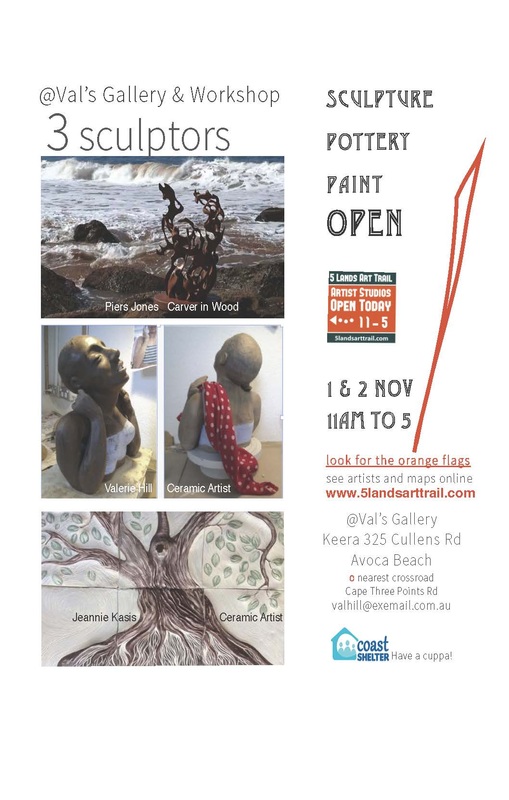
|
Welcome to the CCPS blog!Central Coast Potters Society is a non-profit, community organisation of like-minded volunteers who love clay. Categories
All
Archives
November 2018
|
 RSS Feed
Central Coast Potters Society
|
Workshop
10a Russell Drysdale Street East Gosford, NSW, 2250 |